I am writing this article for those who are looking to connect their OBIHAI device (in this instance an OBIHAI OBi 1022) to their Anveo phone number and service. I specifically referenced the OBIHAI OBi 1022 because that is the model I have. These steps could very well work for other models, but the 1022 is the only model I have.
Pre-Requisites
- You must already have the following accounts.
- You must already have purchased a telephone number and service from Anveo.
- You must have already assembled your OBIHAI desk phone.
Process
- Login to your OBIHAI OBiTALK account.
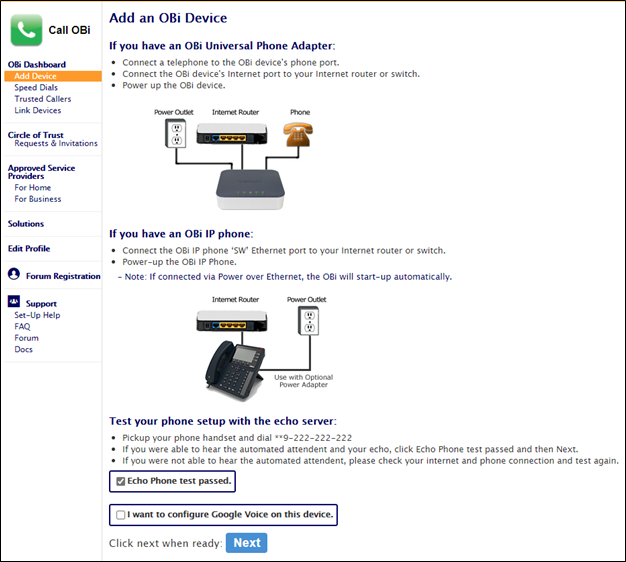
- Select “Add Device” from the sidebar.

- Follow the instructions provided to connect the device to Ethernet and power.
- Allow the device to startup.
- Perform the Echo Phone test as advised.
- Once the echo test has completed successfully, select the checkbox next to “Echo Phone test passed.”
- Do not select the checkbox next to “I want to configure Google Voice on this device.”
- Click on “Next.”
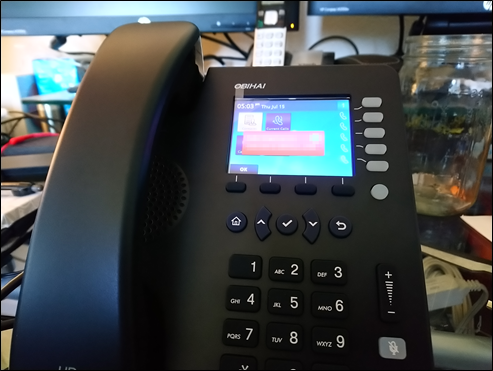
- On the next page you will receive instructions to dial a number.

If successful, the page should refresh to indicate that your phone was detected. You will also see a red box appear on your phone’s display indicating “Code sent to OBiTALK”.
- Click “Confirm” if the information displayed is correct.
- After confirming, you will return to your OBi Dashboard.
- Allow your OBIHAI device to restart.
- At this point you may want to rename your OBIHAI device. Especially if you have more than one. This is easy to do by selecting the name of the device from your OBi Dashboard.
- From the Options, update the “Device Display Name” based on your needs.

- Update the “Webpage Admin Password” and “Obi Attendant PIN (4 digits)” fields. Do not leave these set to their default values.
- Click on “Save”. Your device screen may go blank for a moment. The device is simply updating based on the changes you just made.
At this point, you can use the device to dial other OBiTALK connected devices. Simply dial **9 followed by the 6-digit OBi number. Your OBi number can be found in the OBi Dashboard. These calls are free. This could be a great way for family and friends to stay in touch. Simply buy the device and call each other using the OBi number.
- Next, we want to connect our OBIHAI device to Anveo.
- Login to your Anveo account. If you have sub-accounts, make sure you are logging into the sub-account you want to associate to the OBIHAI device.
I underlined “make sure you are logging into the sub-account you want to associate to the OBIHAI device” based on personal experience! I have two sub-accounts in my primary Anveo account. When I was setting up my secondary phone I forgot to switch to the secondary account. After I had completed setting up the secondary device, I was able to make calls, but they appeared to be coming from my primary phone. Thankfully, it was an easy fix.
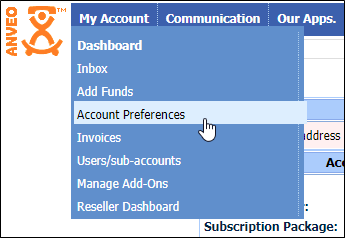
- Hover over “My Account” in the top menu then select “Account Preferences.”
- Click on the “Edit” button next to the number you want to associate to your OBIHAI device.
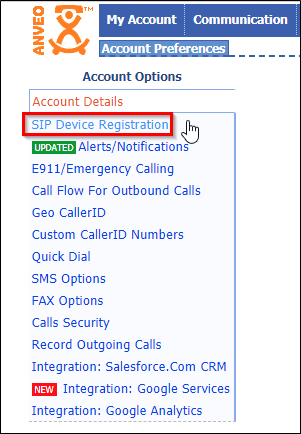
- Select “SIP Device Registration” from the Account Options.
- You will be taken to a page which contains your SIP username and password. Stay here for the moment. Ensure the webpage does not timeout.
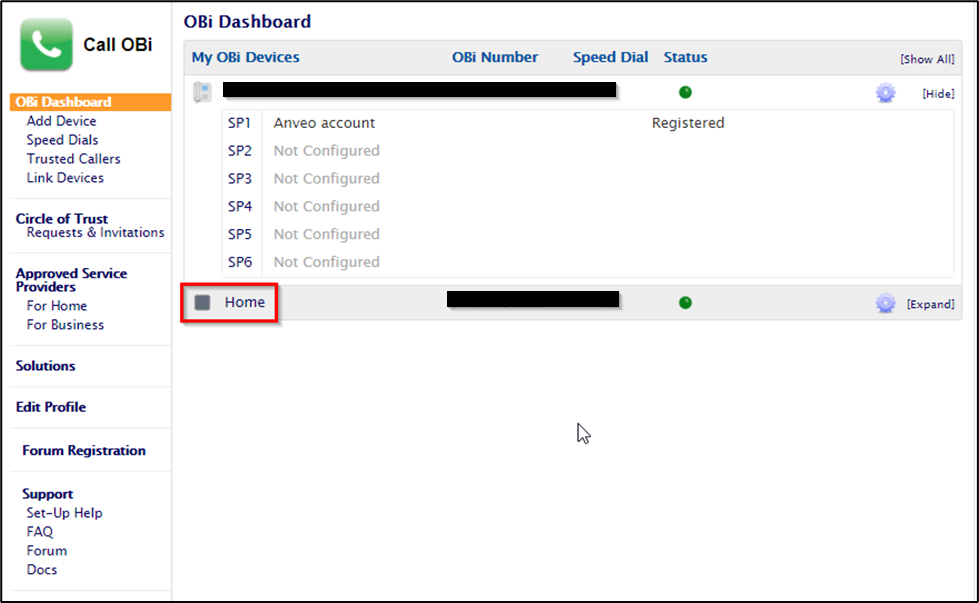
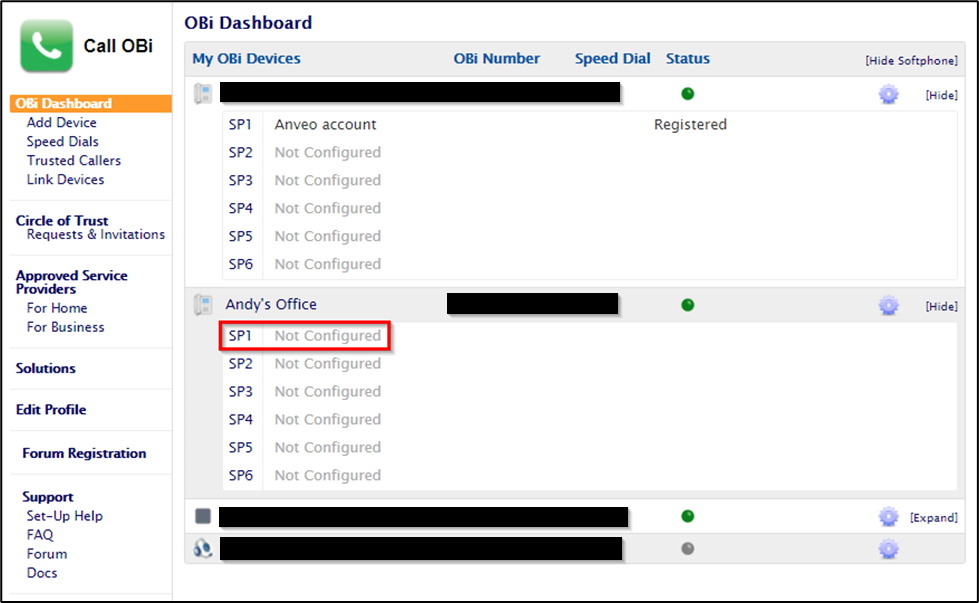
- In a separate browser window or tab (I highly recommend putting two browser windows side-by-side if you have the screen real estate), return to your OBi Dashboard and expand all options for your OBIHAI device. Select “SP1” from the list of options.
Use one of the other options if you already have a line configured. Also, if you decide in the future that you would like another line added to the phone, you can use SP2, SP3, etc. for those numbers.
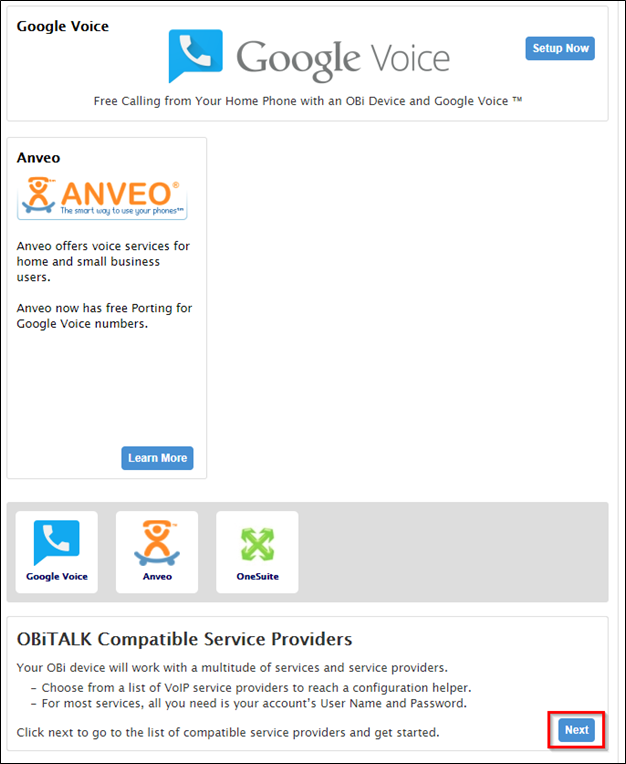
- On the next screen, below the “ObiTALK Compatible Service Providers” header, click on “Next”.
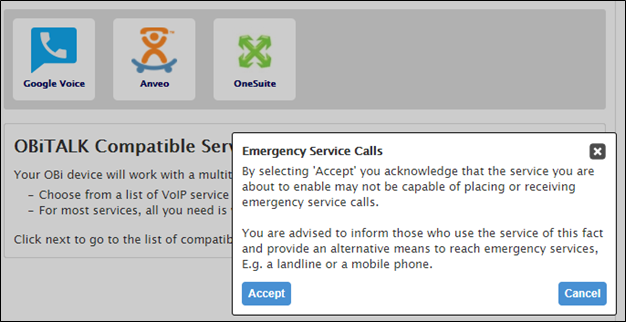
- Accept the acknowledgement that the service you are enabling may not be able to make 911 calls.
- Select “Anveo” which is conveniently at the top of the list.
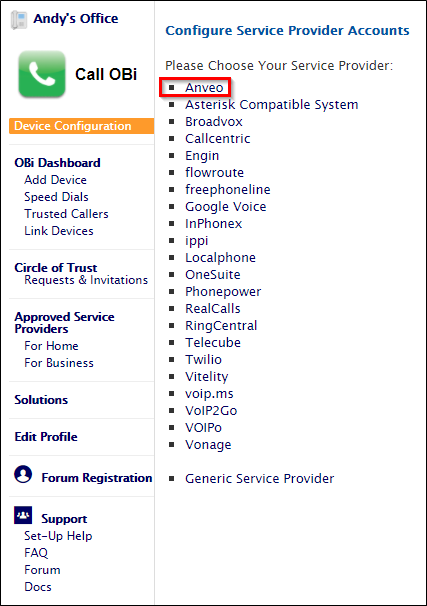
- Populate the form using the following guidance.
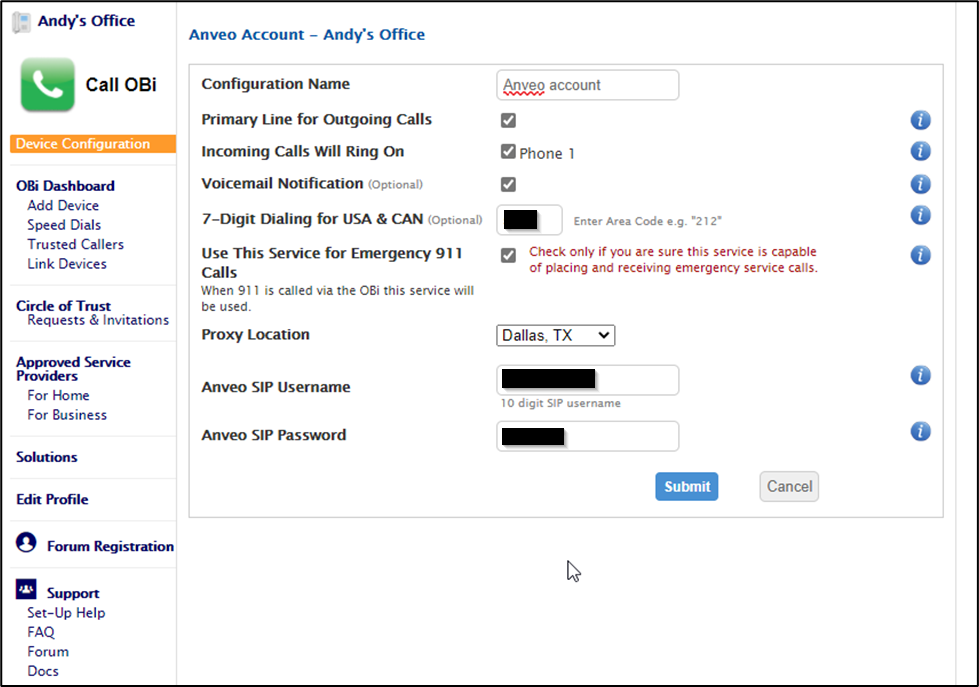
- You can update the “Configuration Name” if you wish. I personally leave this set to “Anveo account.”
- I also leave “Primary Line for Outgoing Calls”, “Incoming Calls Will Ring On”, and “Voicemail Notification” checked and set as default.
- If you do not want to have to dial the area code for numbers in your same area code, you can enter the area code for your telephone number into the “7-Digit Dialing for USA & CAN” field.
- If you have subscribed to Anveo’s Emergency 911 service, you check the box next to “Use This Service for Emergency 911 Calls”.
- There are only three locations for “Proxy Location”. Select the location closest to you.

- Finally, copy and paste both the Username and Password from the Anveo window to the OBi window. Once completed, click on “Submit” in the OBi window.
- You will be taken back to your OBi Dashboard and your OBIHAI device will refresh its configuration. You may need to refresh the OBi Dashboard a couple of times until the device shows as fully registered. For me, it initially showed as “Registered” then switched to “Retrying Registration.” I gave the OBIHAI device a couple of minutes to reload its configuration then I refreshed the OBi Dashboard. It then showed as “Registered.”
- Next, we need to direct calls coming into our telephone number to our OBIHAI device (our SIP device). From your Anveo account. Hover over “Phone Numbers” and select “Manage Phone Numbers.”

- Select “edit” next to the applicable number.
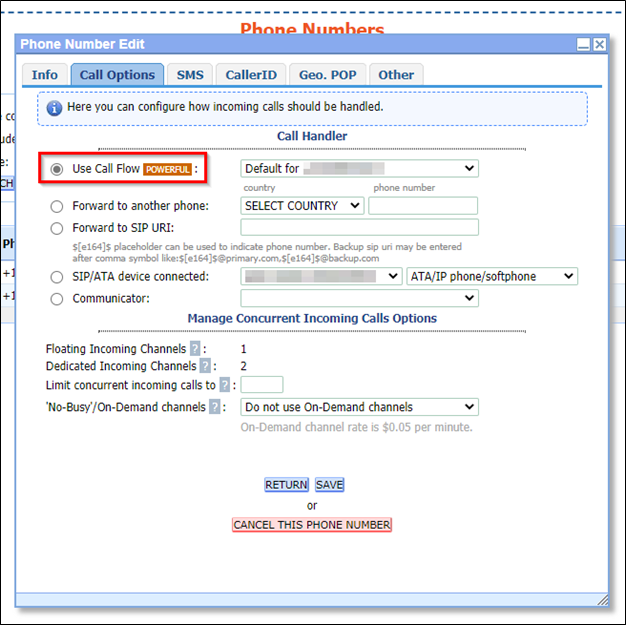
- Select the “Call Options” tab.
- OPTION 1: You can “Select “SIP/ATA device connected.” This will deliver the call to the device without any special handling. If there is no answer, the call will simply disconnect. OPTION 2: My recommendation is to use the “Use Call Flow” option. Anveo’s default call flow will detect whether the call is a FAX or a normal call and direct it appropriately.
- Once you have saved the settings, you should now be able to receive, and place calls on the device you just configured.
- If you have multiple accounts, and selected “Use Call Flow” from Step 33, you will want to ensure that voicemails are going to the appropriate mailbox. From the top navigation menu, hover over “IVR / Call Flow” then select “IVR / Call Flow Builder.”
- This will show all flows for your account. Click on the “edit” button next to the applicable call flow. You will be taken to Anveo’s call flow builder.
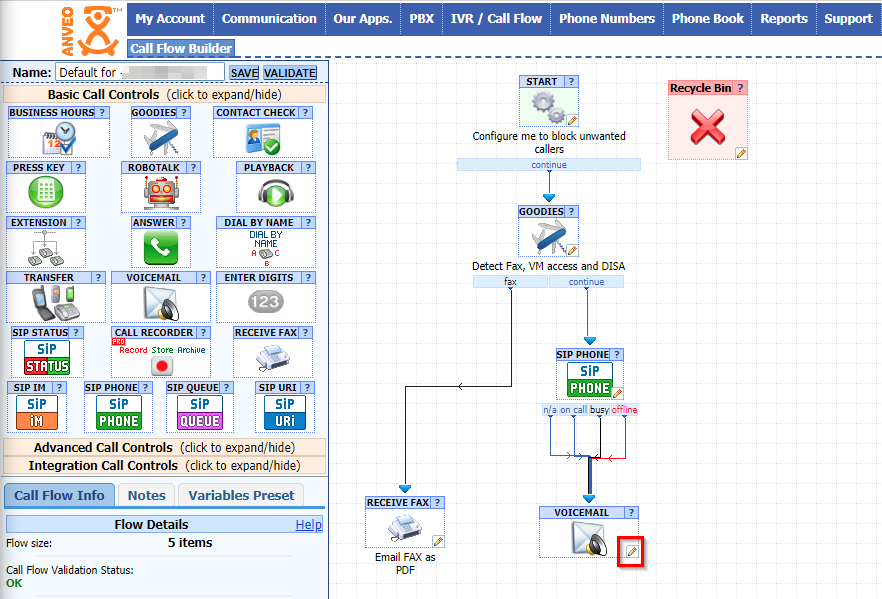
- Click on the pencil icon next to the voicemail icon in the call flow editor.
- Ensure that the “Voicemail Box/Profile” option is set to the appropriate box/profile.
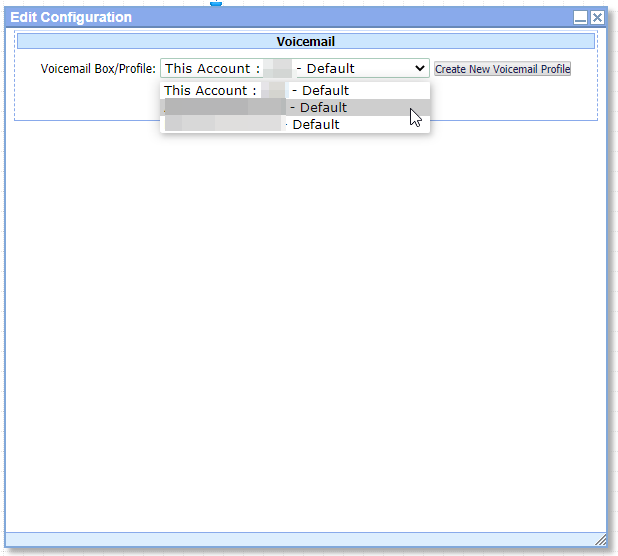
- Click on “Update Configuration.”
- Make a test call to the device and leave a voicemail. If you do not get prompted to leave a voicemail, ensure that you selected the correct box/profile.