by andymelton | May 15, 2007 | Software
You’re probably asking yourself: “Is he really reviewing another virtualization product?” Yeah, I am. I guess it’s a virtualization review special on TechButter. Like I mentioned in the previous article I am reviewing these products because I am unable to run them on my iBook due to it’s limited resources. I realize there is a PC version of Parallels but I want to see how well the Mac version performs since I get the opportunity to play with a brand new Intel iMac for a week.
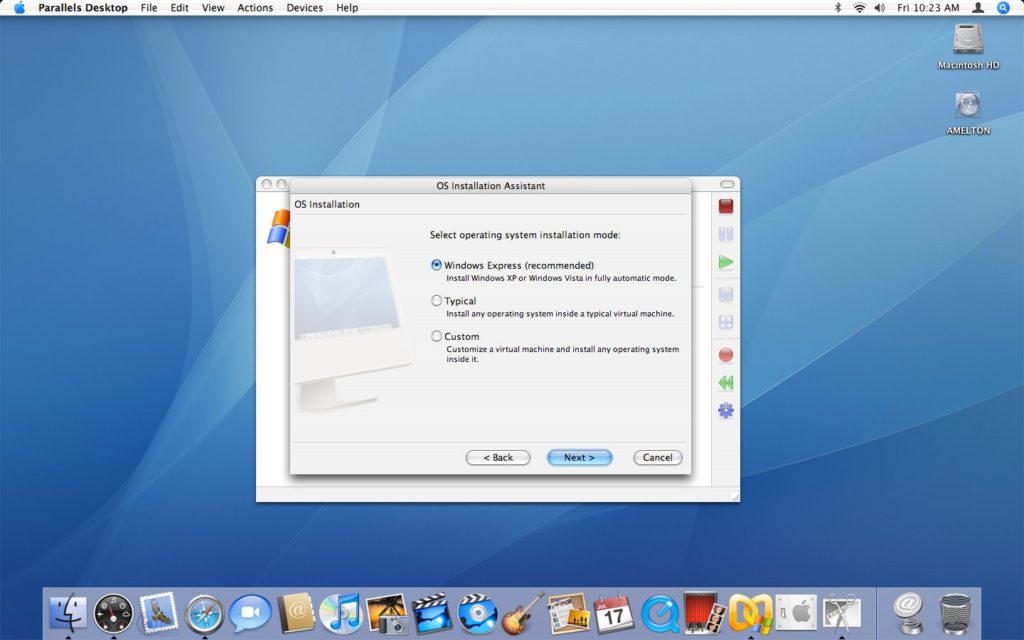
When you first launch the application you are presented with a wizard which gives you three choices. The first choice is “Windows Express.” The description for that option says “Install Windows XP or Windows Vista in fully automatic mode.” This option presumably is just like the option we found in Fusion when we installed Windows Vista. The other options are for “Typical” and “Custom” virtual machine configurations. Just like the other review, I will be installing Fedora Core 6 as well as Windows Vista. I want to compare the performance of the two products. I’ve heard a lot of good things about the performance of Windows Vista using Parallels virtualization and that is what we are going to start with, Windows Vista.
The settings wizard is a lot like every other virtualization product I have ever used. I suppose by now all of them are fairly standard in the configuration options. There was a neat effect when I started up the virtual machine, the screen flipped the settings window around and started up the virtual machine, as if the virtual machine were on the back side of that window.
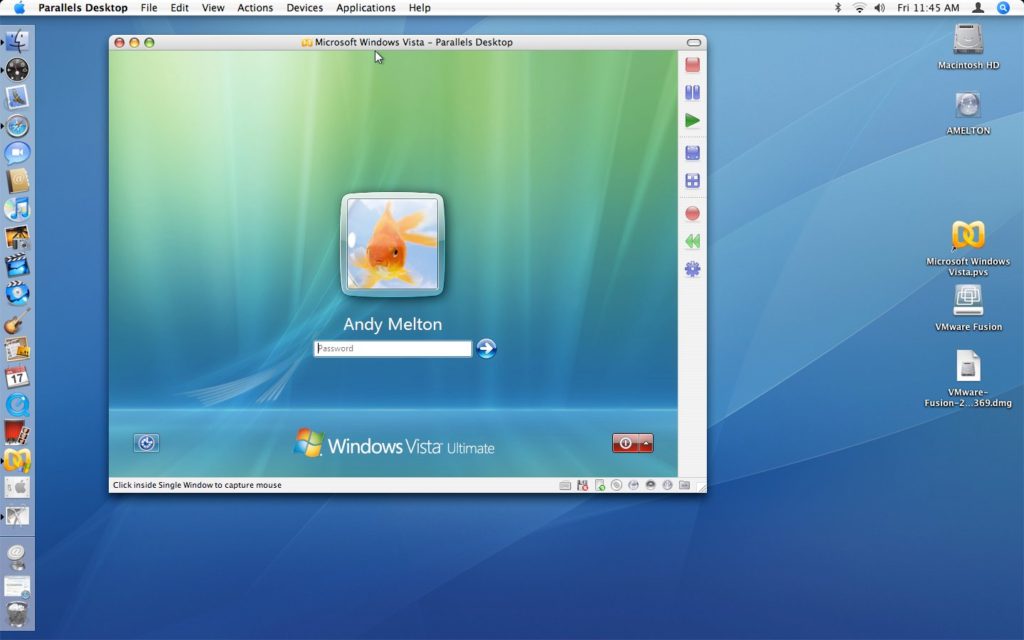
Just like with VMware’s Fusion, the installation of Vista in Parallels Desktop was successful without any problems and I didn’t have to answer any questions until I got to the Windows Vista desktop, where there was a dialog box saying that once Parallel Tools is installed, Vista will need to be rebooted.
A good touch that the developers added to Parallels Desktop is that on the OS X dock there is a thumbnail of what is currently going on in the virtual machine. It’s not a major feature but it is definitely a nice touch.
Once Parallel Tools was installed I noticed something that I did not notice when I installed Vista into VMware Fusion, when the system shutdown and rebooted the shutdown sound played and when the system restarted, the startup sound played as well. To me, this makes me think that the performance of Vista is going to be substantially better in Parallels than it was in Fusion. It most certainly appears that way.
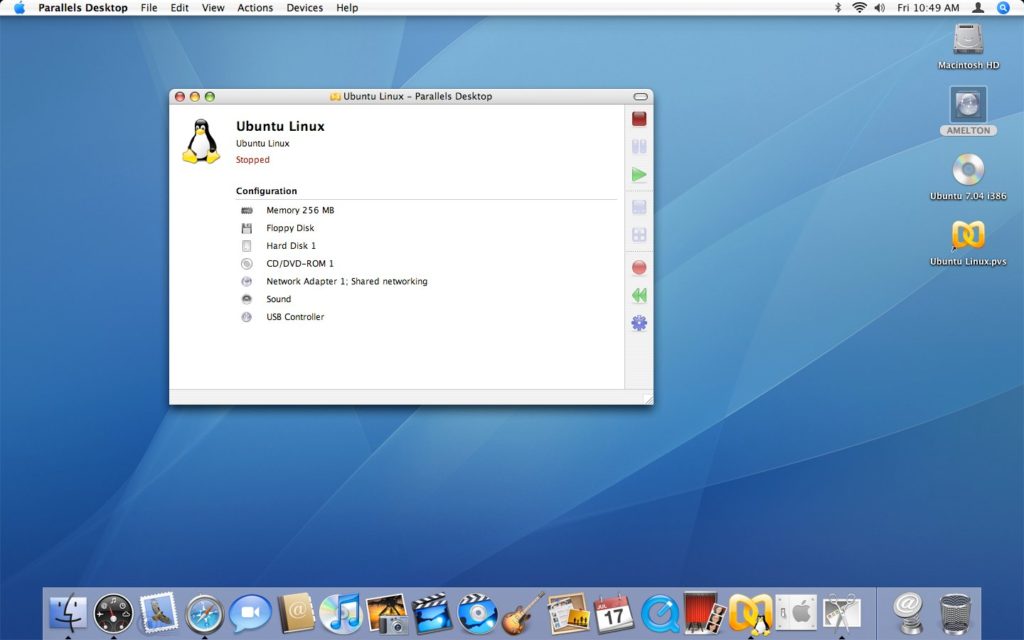
I decided to look at the settings for the virtual machine and noticed that you can adjust the virtual machine’s video memory. The maximum recommended amount of memory is 16 MB but you can take it up to 32 MB of RAM. Unfortunately 32 MB of RAM is not enough to use the Aero Glass feature of Windows Vista.
Parallels has a cool feature called Coherence. When you activate Coherence the background and desktop icons in the virtual machine disappear, so do the Parallels application windows. The Windows Start Menu is then displayed on your OS X Desktop. You can launch applications in your Windows virtual machine by using the start menu on your OS X desktop instead of opening the virtual machine window and launching the application. The application still has Windows borders, but, if you need Windows applications but also need access to your Mac applications at the same time, this is a great feature.
I have to say that I am extremely impressed with the performance of Windows Vista in Parallels over VMware Fusion. Although there are a lot of things that are sluggish, like starting a slideshow or using Windows Media Player, the operating system itself is actually pretty usable. When I had Vista installed into VMware Fusion I was unable to play with the Windows Media Center feature. I am able to in this installation in Parallels.
Another great feature of Parallels Desktop is that they have bundled Kaspersky Internet Security into their product. If you install a Windows virtual machine this will allow you to be keep your Windows virtual machine protected from outside threats, that is, if you get online with your Windows virtual machine.
Unlike VMware Fusion you also have the ability to take screen shots of the running virtual machine. However, there is no video recording option available. However, like VMware Fusion you have the option to share files and folders between your virtual machine and your OS X host machine.
If your virtual machine is growing in gigabytes you can use the Parallels Compressor to decrease the size of your virtual machines disk image. This runs disk cleanup and disk defragment utilities. Supposedly this can reduce the size of your virtual machine by 50%. A cool thing about Compressor is that it works with VMware Workstation, Microsoft Virtual PC and of course Parallels Desktop (both Mac and PC versions). Using this feature of Parallels Desktop my installation of Vista was reduced by several gigabytes.
If you have the BootCamp drivers, you can install all of the integrated hardware of your Mac into your virtual machine, such as the built in iSight camera which comes standard on almost all of Apple’s new computers.
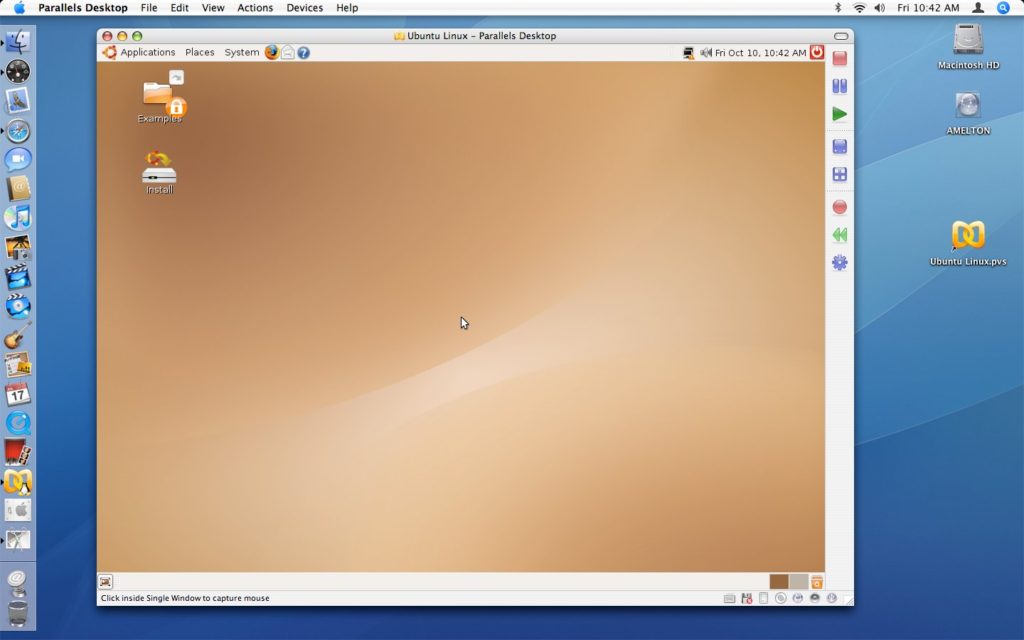
After I had got tired of playing with Windows Vista I decided to install Fedora Core 6 into a virtual machine with Parallels. I immediately appreciated the fact that the Parallel’s developers felt as though Fedora was worth listing in their list of OS choices. Like I said in the VMware Fusion review, I know they can’t list them all, but, I believe Fedora is popular enough that it should be listed.
When I got into the Fedora Core installation I was impressed that the Fedora Core installer detected the hard drive. If you remember from the VMware Fusion article and if you’ve read any of my tutorials in the past, you’ll know that I have always had to make sure to change the virtual machine’s hard drive from SCSI to IDE when using VMware products. Since Fedora Core was one of the options, I am absolutely certain that the Parallels developers made sure that everything would work.
Once I had got Fedora installed I had problems with the display resolution. It worked immediately after installation but when I would reboot I would only come to a text based login screen. I made some changes to the XORG configuration file and finally got into the GUI. However, when I would reboot again I would only come back to the text based login so I had to modify the XORG configuration file every single time to get into the GUI. I re-installed Fedora three times and got this every time. I won’t blame Parallels nor will I blame Fedora since I honestly don’t know who is at fault.
Even though I had problems getting into a graphical interface, the resolution that I was able to use was much higher than what I was able to use when I had Fedora installed into VMware Fusion. In Fusion the resolution would go no higher than 800×600, but in Parallels I was able to take the virtual machine into full screen mode using 1440×900, out of full screen mode the resolution would go well beyond that.
The performance of Fedora in Parallels was amazing compared to the performance I got in Fusion. Menus and applications opened without stuttering and seemed to perform a whole lot better as well. When you would move a window around on the screen it was actually a clean move and without flickering.
Another feature that I like in Parallels is the ability to clone an operating system. A similar feature is available in VMware Fusion and other VMware products called “Snapshots” which allow you to capture a guest machine in it’s current state and revert back to it at a later time. It’s basically the same thing in Parallels but I personally prefer the way Parallels has done it. During the cloning wizard you get to choose what to backup and where to back it up to.
One of the only feature requests that I would make is that they integrate a way to make video screen recordings. This should be a standard feature, especially if you are paying for the product.
If you can’t already tell, I am extremely impressed with the quality of Parallels over VMware’s Fusion. I really do like VMware’s products, but seriously, Parallels has got them beat on performance. Although Parallels is $79 (for the Mac version) and VMware Fusion is free (for the moment), if you can spring for Parallels I would do it. They’ve put a lot of hard work into the application and it shows.
Parallels Desktop for Mac
Article update: Wednesday, October 11, 2008: I have updated this article with screen shots from the latest version of this product. Please note that in the article I talk about installing Windows Vista but you are now seeing screen shots of a virtual machine running with Ubuntu 7.04 and only a Windows Vista login. I’ve been updating the screen shots on TechButter so that they look great with the new, wide theme.
There is still no video recording option in Parallels. For an $80 application I think this is something that should be standard.
As of writing this article update I have to say that I would recommend Parallels Desktop over VMware Fusion and VirtualBox. I think it works better and has a better feature set.
by andymelton | May 12, 2007 | Software
NOTE: Please see the end of this entry for updated information about this product and what has changed in this article since the original posting.
I finally have the opportunity to try out VMware Fusion. I am staying at a house this week for a family member who just purchased a new iMac. While they’re gone on vacation I’m going to try out a lot of Mac software that I’ve been looking forward to playing with. First up is Fusion from VMware.
When you first launch the application you are presented with the options of either creating a new virtual machine or downloading one. This reminds me a lot of “Q” (a free, open source virtualization project) which presents you with similar options. With VMware Fusion you will find a lot more options because of their growing Virtual Appliance Marketplace which is growing every single day with new virtual machines. VMware’s Virtual Appliance Marketplace gives users the ability to try out software before they install it or have to commit hardware to an application.
For the review of VMware Fusion I am simply going to install a copy of Fedora Core 6 and I may also try Windows Vista Release Candidate 1; which I received several months ago before Vista was released in January of this year (2007). It’s outdated, but it will give me an idea of how VMware Fusion and this iMac performs.
When you get to the point in the wizard where you tell VMware which operating system you are going to be installing; there is still no option for Fedora, which, really annoys me. It’s not listed in VMware Server for the PC either. You simply have to select “Linux” and then “Other Linux”. I can understand that they cannot list every single distribution but it seems as though Fedora has a large enough user base to be added to the list. Though, I’m sure users of every distribution would say that.
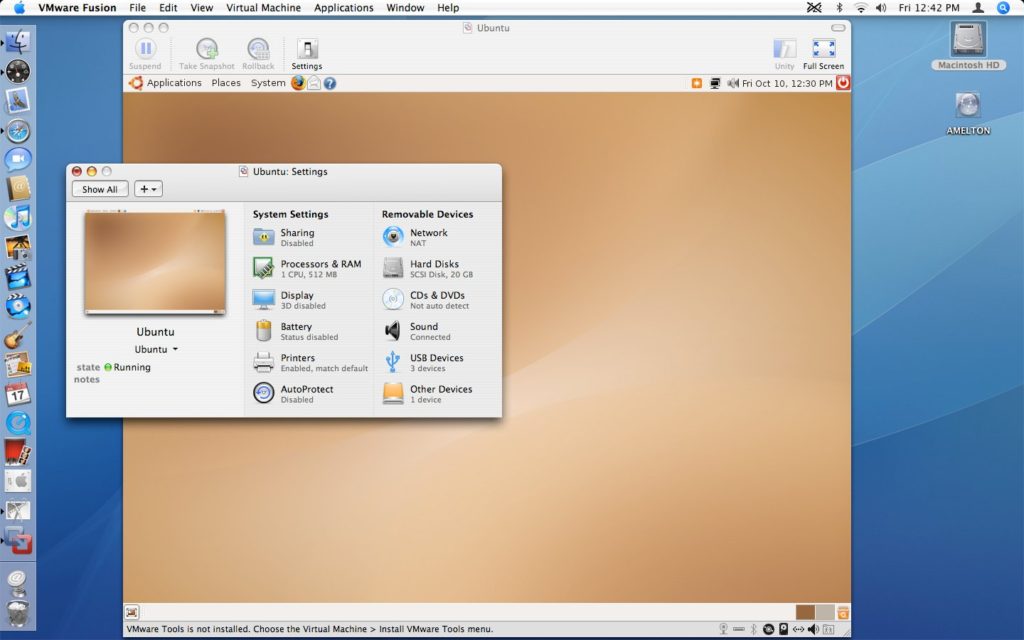
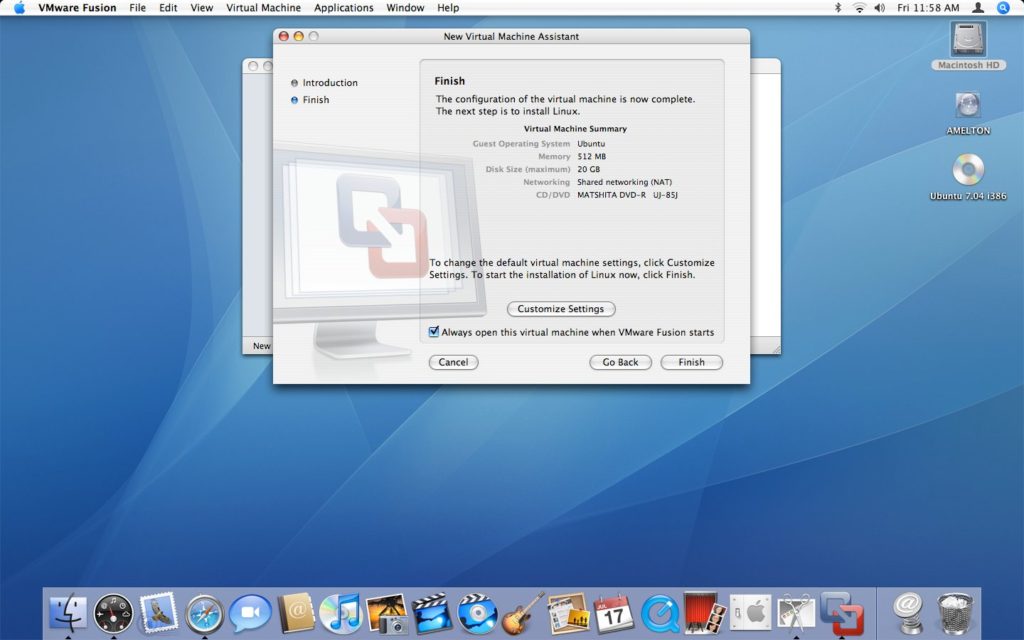
There isn’t a whole lot of difference in the wizard on the PC and the Mac versions of VMware products. Easy. Simple. Wording is the same. When you have finished setting up the virtual machine you are presented with the settings for that virtual machine, just like you are with their PC virtualization products. The windows of course look different since VMware Fusion is for the Mac. All of the default settings are the same as well, such as memory is at it’s standard 256 MB.
There is an option to accelerate graphics. Unfortunately, it says that it is only available to Windows XP Service Pack 2 guest virtual machines.
Another interesting option which at the moment I do not recall being on the PC version is the ability to pass battery status to the virtual machine. This would be useful if you were in full screen mode a lot and were using a laptop.
When you start up a virtual machine it tells you that the software is running in debugging mode. I read a few days ago that you can disable this to increase the performance of the virtual machine. For now, I am going to leave it enabled and see if I notice any side effects.
Unfortunately when I got to the point in the Fedora Core installation I had to shutdown and remove the hard drive and re-add one, this time making sure the option was IDE. I have this same problem with Fedora on VMware Server for the PC.
NOTE: Please see article update at the bottom of this post regarding the new screen shots for this post.
Once I got Fedora Core 6 installed, the performance wasn’t all that great. I decided since the iMac I am running this on has 1GB of RAM, I would increase the virtual machine’s memory to 512 MB and disable the debugging code. The performance did increase somewhat however it would have been a lot better if I were on a faster Internet connection so I could install the required software from the YUM repositories to install VMware Tools.
One thing that I did not like is that in the PC versions of VMware’s products there is an “Inventory View” which shows you all of your virtual machines. Using the Inventory View allows you to easily delete un-wanted virtual machines. In VMware Fusion however, there is not an easy way to delete the virtual machine in the application, that I know of. You can’t drag it off into the trash, right click on it and delete, none of the menu options allow you to delete any of them. I simply deleted the virtual disk from the hard drive to free up the disk space. By doing this, the virtual machine is no longer listed in the Virtual Machine Library list that appears when you start the application.
Once I shut down the Fedora Core installation I decided to throw caution to the wind and install Windows Vista, the Release Candidate I received several months ago. I say throw caution to the wind but the beauty of virtual machines is that the actual computer is protected from being corrupted.
An interesting feature that is available to Windows virtual machines is the ability to use the “Windows Easy Install.” I decided to try this option just to see how well it would work and exactly what it would do. Using this option you give a username, password and your product key before the virtual machine is even started and the operating system installation is underway. It also gives you the option to have your OS X home folder accessible to the virtual machine by default so you can pass files easily between virtual and host machines.
Windows Vista installed without any problems. I didn’t have to answer any questions during the installation. Fortunately, for those who are installing Vista on real hardware they can get this same feature by using vLite. The performance of Vista was decent, much better than it was in a virtual machine on my PC and it was even better than it was when it was installed directly onto my PC.
Two features that VMware Fusion is missing is the ability to take a screen shot or video of the virtual machine that is currently running. These are great features for writing tutorials or showing someone how to do something. I assume that these features will make it into future editions, once they start charging for the product. Video recordings of a virtual machine are only options you can get with VMware Workstation, which is not free. However, capturing screen shots is available in the free VMware Server.
Overall I am very impressed with VMware Fusion. I think VMware has done a great job of creating a virtualization product for the Mac. I’m very happy to see that VMware is going after the virtualization marketplace on the Mac because they have always been my favorite vendor in the PC virtualization marketplace. In a way I am upset to see that VMware Fusion is only available for the newer Intel based Macs, but, with that said, the performance of the new Intel based Macs combined with VMware Fusion comes together for a great virtual computing experience.
VMware Fusion
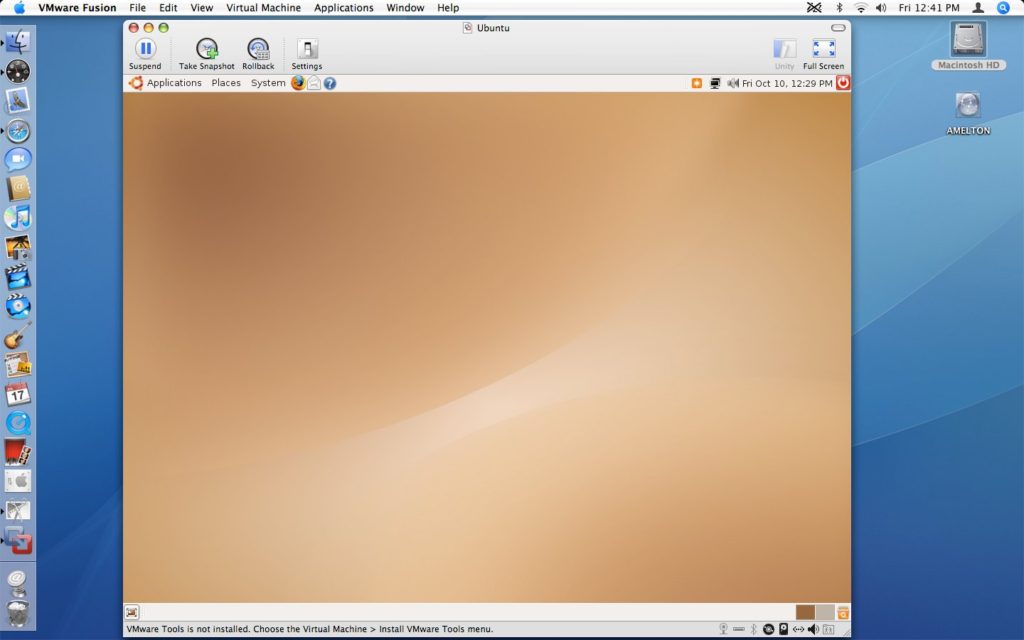
Article update: Wednesday, October 11, 2008: I have updated this article with screen shots from the latest version of this product. Please note that in the article I talk about installing Fedora Core 6 but you are now seeing screen shots of a virtual machine running with Ubuntu 7.04. I’ve been updating the screen shots on TechButter so that they look great with the new, wide theme.
A few things to tell you about the updated product. First of all, the default memory. In the article above I mention that the default memory is 256 MB for virtual machines. They have bumped this to 512 MB as the default.
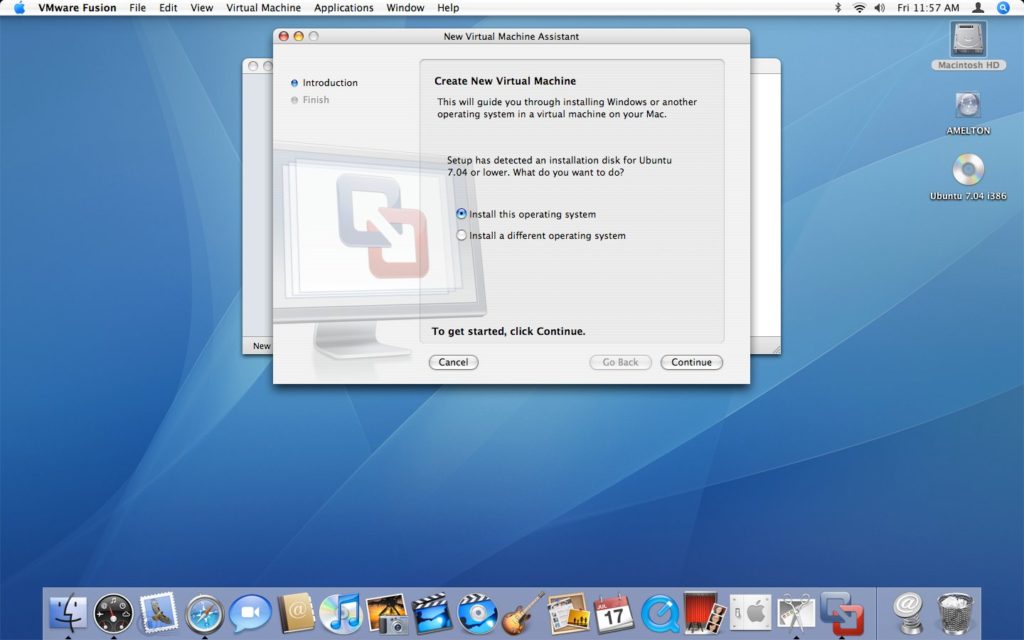
A neat feature of VMware Fusion that is either new or a feature that I missed when I wrote the original article is OS detection. If you have an operating system disc in the drive when you are creating a virtual machine and VMware Fusion recognizes it, you can use it’s custom settings for that operating system. I used Ubuntu 7.04 which is an outdated version of Ubuntu and was surprised to see that it recognized it.
The fact that there are pre-defined settings for various distributions of Linux and the various operating systems is a really great feature. It allows the developers to make the virtual machine work a lot better. Sound files played without having to install any additional software, which usually, you have to do when you’re working with Linux virtual machines.
The performance of running virtual machines in VMware Fusion has been increased. I don’t think it’s just the fact they changed the default memory from 256 MB of RAM to 512 MB. I think the actual coding of Fusion has been improved to allow a better performance.
I mention above that deleting virtual machines was difficult to find. Deleting virtual machines in the most current version isn’t obvious, but maybe that’s a good thing. It is in the menus, though.
I really hate that I cannot remember whether or not the version I originally reviewed had the “Unity” feature or not. However, the latest version does. Here is the description of “Unity” from VMware’s website:
Run Windows applications like Mac applications, quickly switching between Mac and Windows applications, minimizing Windows applications to your Dock, and even store Windows applications in your Dock to launch at a moment’s notice.
Unity works pretty much the same way Parallel’s “Coherence” mode works. I think all the Mac virtualization product vendors are making sure to implement that as a standard feature.
Unfortunately, there is still not an easy way to quickly capture screen shots or video from VMware Fusion. You would think that VMware would implement this feature since Fusion is their virtualization product for the Mac.
There are a ton of other features. I didn’t even begin to scratch the surface due to time constraints. Learn more about VMware Fusion’s features.
As of writing this article update I have to say that I would recommend Parallels Desktop over VMware Fusion and VirtualBox. I think it works better and has a better feature set.