by andymelton | Nov 30, 2007 | Software
Since I got this iBook G3 I’ve been primarily using it for communication (email, instant messaging) and multimedia (audio podcasts and my music collection). Unfortunately, the iBook doesn’t have a great deal of power since it is running Tiger which is a bit more resource intensive than OS 9 which is what the iBook shipped from the factory with. Checking my Gmail account was extremely painful because with all of the browsers it took an incredibly long time to load the interface and every email that I would click on would load painfully slow.
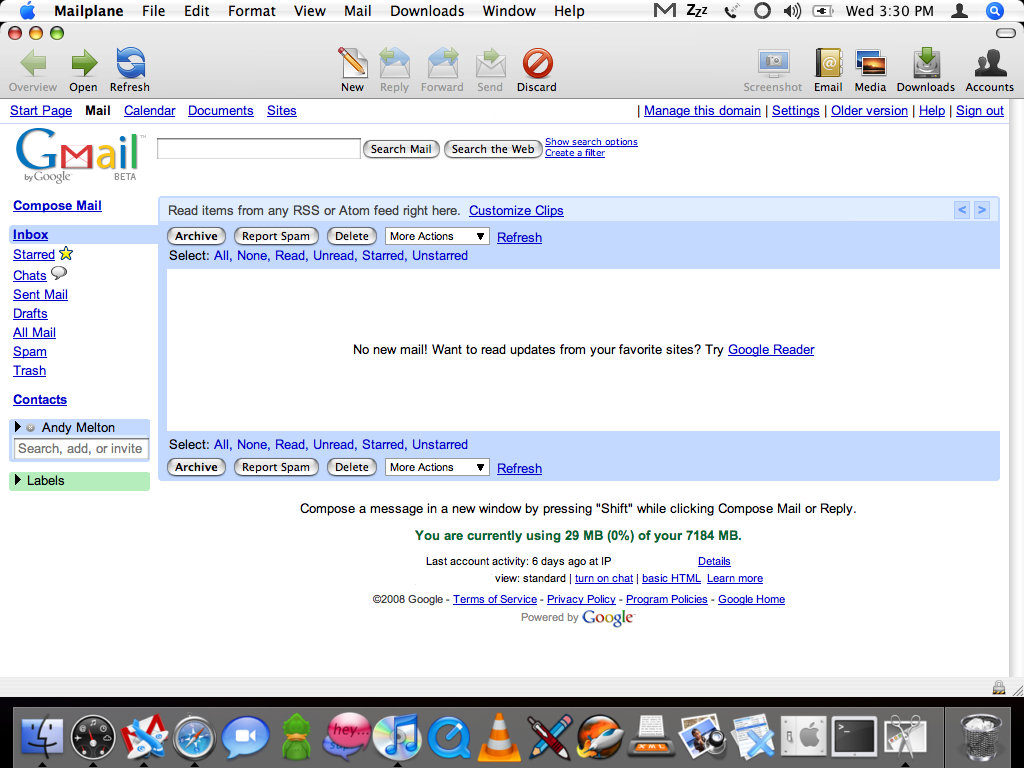
Fast forward a couple of months after getting the iBook I found an application called Mailplane. When I first saw the application I was extremely skeptical of it. I questioned why there was a need for such an application when I could simply load Gmail in a web browser and do everything I needed to do in the browser. I figured it was one of those applications that just made it easy for lazy people to gain access to their Gmail account. I didn’t sign up for the beta then but fast forward a couple of months and I got to wondering about it again.
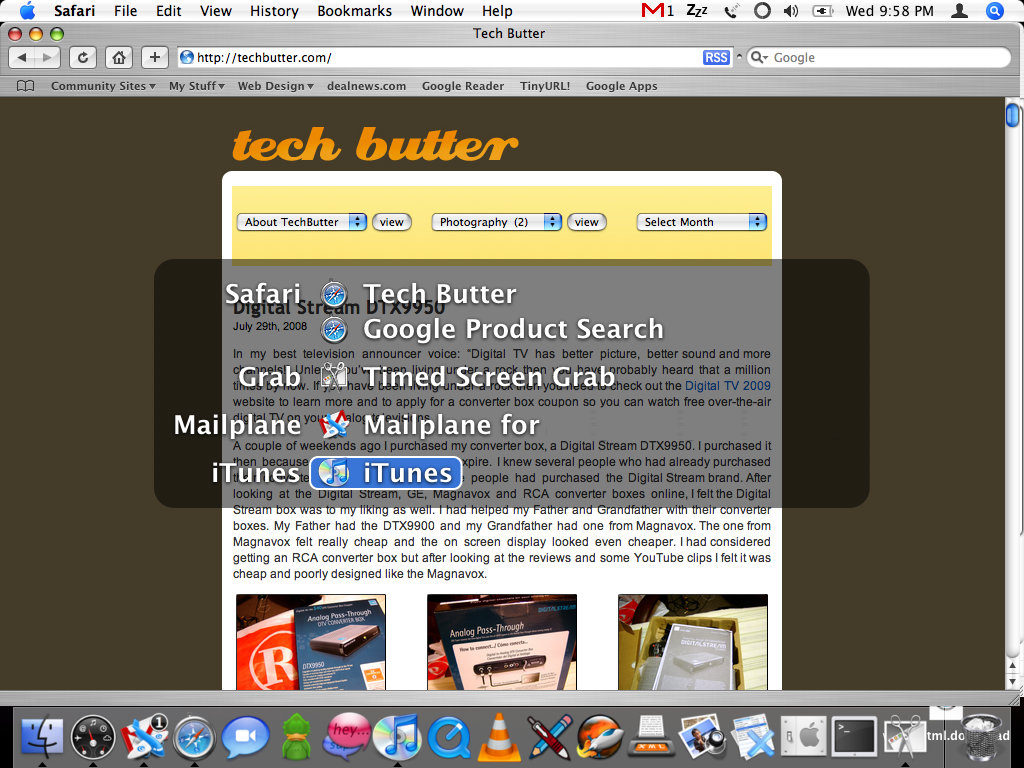
I signed up for the beta and downloaded the application. Immediately it hit me as to why this application was needed. Accessing my Gmail account was extremely fast using Mailplane. Accessing Gmail using Mailplane was much faster than accessing the account with a browser even if I was using my best computer. I am not an application developer but my guess would be that there is some sort of caching happening behind the scenes. There has to be because it is so fast! When I get an email I am notified in the menu bar of Tiger and if I want to go view the message I can simply click on the Mailplane icon and have immediate access to my email.
Mailplane has other features but I will be honest with you, I don’t use them. The icon toolbar at the top of the application allows you to navigate your Gmail account, add stars, archive, access the online version of Google Talk, access your photos for sending via email. All of that is great but again, I don’t use them because I still primarily use the interface that is provided inside of Gmail. The only feature that is available that I will probably use in the future is the multiple accounts feature which I’ll be using once I get my domains set up with Google Apps (which is also supported by Mailplane).
I don’t have a complaint about the application however I would definitely like to see the application upgraded so it can take advantage of the new features availalbe in the updated version of Gmail. I especially like the ability to easily filter my messages and would like to be able to do that using Mailplane instead of going to another computer to access my Gmail account to create filters. I realize that you can do filtering via the settings and I have been doing that ever since I got my Gmail account in 2004 but the updated version of Gmail allows you to “Filter messages like this” very easily via the drop-down menu in your message pane.
The application is still in beta but I was able to purchase the application at a special discount since I was a beta user. I am not sure what the pricing will be once it is out of beta. I don’t regret purchasing this application due to the convenience it has added to using my Gmail account and I do recommend it especially if you are like me and have an older machine or hate having to wait on your Gmail account to load.
I think the developer of Mailplane has done a tremendous job and I look forward to more updates. I’d also love to see the developer create an application like Mailplane but for Google Reader. That would be really useful, too!
Mailplane for Mac OS X
Article update: Sunday, December 2, 2007: The latest unstable beta of Mailplane that I just installed does take advantage of the latest version of Gmail 2.0. Thanks!
Article update: Wednesday, October 1, 2008: I have updated this article with a screen shot from the latest version.
Since writing this article in November of 2007 the developer has made many improvements to Mailplane. When Gmail 2.0 was first supported it was very slow. That has been improved and the application is much more responsive with the latest version of Gmail.
by andymelton | Jun 30, 2007 | Software
On Monday morning my 17″ LCD monitor decided to kick the bucket. I guess it was time for it to go out, the 3 year warranty expired in January so that’s usually when things go out. Since then I’ve been using my iBook a lot more because it has a brighter display than the CRT monitor I have attached to the PC. Since I’ve been using the iBook more and it is in front of me now, I decided to start using it to work on my website projects.
I had heard of Taco HTML Edit before and had even had it installed. When I first installed it I honestly did not give it a good chance. I guess since I needed to use it I gave it a better chance and I am glad I did. I have found a lot of great features in the software and am really enjoying it so far. Let’s look at some of the features.
Grouping Files As Projects
The first feature that I immediately used was the projects feature. I use this religiously in Macromedia Dreamweaver and was very pleased to see that a similar feature was available in Taco (I think I’m going to be craving tacos by the end of writing this entry). This feature allows you to define a folder as a project. Whenever you open a project you have all the files in that project at hand, you don’t have to go hunting all over the place for everything, it’s really nice.
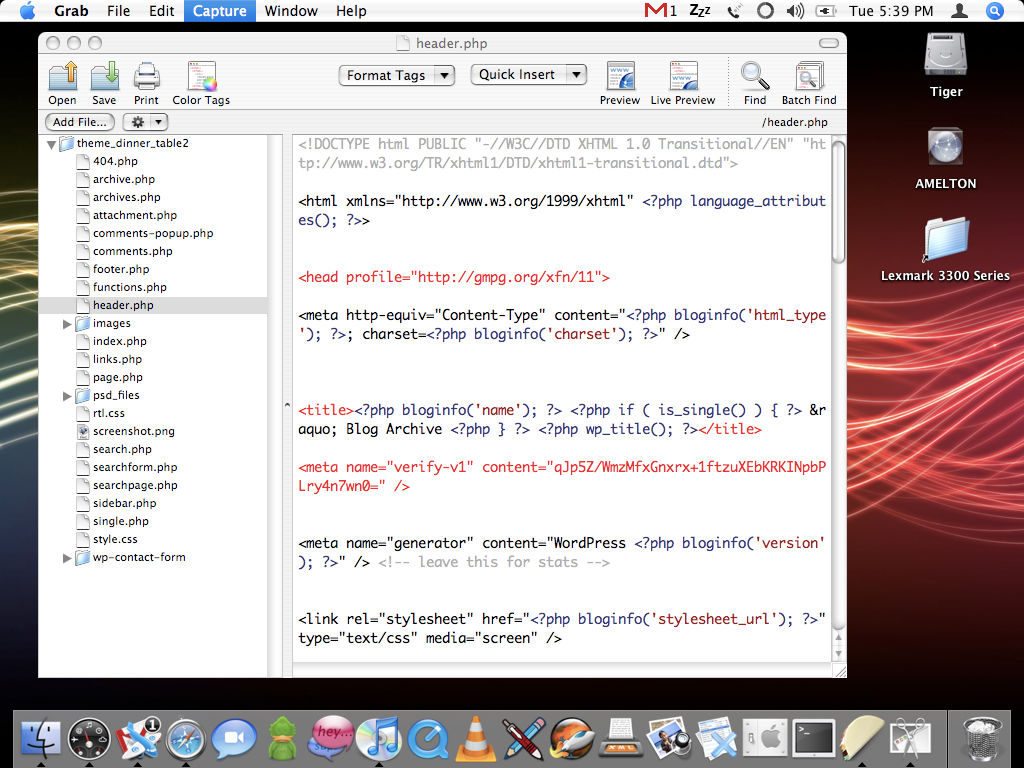
When you open up a project the files will open in a new window with the files on the left and a text editor window to the right. The window looks really bare from what you see when you first open Taco. There are no icons in the project editor by default. I usually work with projects rather than single pages and I decided to add more icons to the toolbar, it’s easy enough to do: right click on the toolbar and click on customize, drag and drop the desired icons.
Code Clippings
The next feature I want to talk about is clips. You can put code into clips and when you need to insert that code into your file you just click on that code from the clips menu.

It’s like having code permanently copied so you can always paste it. I’ve been using this a lot this past week on a client’s project where I need to use the same biographical header information on several of their artist’s pages.
Tag Organization
I think I’m fairly good at writing code in a clean, easy to understand manner. However there are times that it can become cluttered. Luckily, with Taco you can clean up your code by using “Organize tags” under the Syntax menu.
Normally I would be hesitant to use a feature like this out of fear that it would jumble my code. I’ve used several text editors and they’ve all done a horrible job at this, however, Taco done a really beautiful job of cleaning up the code and making it look really nice on the screen and easy to follow.
Batch Find
Lately I’ve been doing a lot of work with designing WordPress themes for my clients and I like to do most of the work offline. This means I have to link files to a local network server.
Once I am ready to put the project online on the client’s hosting account I have to make sure the links to the local network server are pointing to their domain. I usually use Dreamweaver for this task but I am really pleased to see that a similar feature is available in Taco.
Syntax Checking
Unfortunately we all make mistakes. I make mistakes all the time when I’m writing code, I’ll forgot to close a tag, add a parenthesis, etc. Silly mistakes usually that take time to find. Fortunately, Taco has a built in Syntax checker. It doesn’t check for compliancy with the W3C, but you can do that through their website so it’s really no big deal in my opinion.
Format Tags & Quick Insert
Two features that are pretty useful are the format tags and quick insert feature. The format tags dropdown menu gives you options for making text bold, italic, underlined, etc. These are nice and very useful when you don’t feel like typing the syntax out. The other feature, quick insert is even more useful. It lets you insert punctuation, math symbols, vowels and even Greek characters. I personally really like the Quick Insert feature because I can never remember the numbers that represent each symbol.
Code Preview
When you’re finished writing your code (or while you’re working on it) you can preview your code using either the Preview option which opens the page you are working on in a web browser window or you can use the Live Preview which opens the page you are working on in another window inside of Taco, as you change the page this window will update to reflect the changes you are making.
Color Tags
Taco has a feature that lets you choose colors from a color wheel, however, I was unable to get this feature to work, one of the only features I was unable to get to work. Everytime I would click on it, nothing would open. Fortunately, for me, I usually already have color choices set before I begin working on a project.
What it doesn’t have
Some people will be disappointed by the fact that this application doesn’t have a WYSIWYG editor. I am fine with the fact that it doesn’t because I prefer to code my pages by hand instead of letting an editor do it for me. There are exceptions to this when I just need a simple page, but for the most part, I like to do it myself.
Also, Taco doesn’t have a built in FTP client. For me this is also not an issue because I normally work on files on my local network and once I am done working on the files I’ll normally use a standalone FTP client anyways to upload files to the website I am working on. For some people though, this may be a problem.
Great Alternative
I’ve been using this software for a week now and am extremely impressed with it’s features and simplicity. I am really enjoying it and look forward to using it even more. I personally feel as though this is a great alternative to Macromedia Dreamweaver, especially if you cannot afford it’s hefty pricetag. Taco is free! I greatly appreciate that!
Taco HTML Edit
by andymelton | May 12, 2007 | Software
NOTE: Please see the end of this entry for updated information about this product and what has changed in this article since the original posting.
I finally have the opportunity to try out VMware Fusion. I am staying at a house this week for a family member who just purchased a new iMac. While they’re gone on vacation I’m going to try out a lot of Mac software that I’ve been looking forward to playing with. First up is Fusion from VMware.
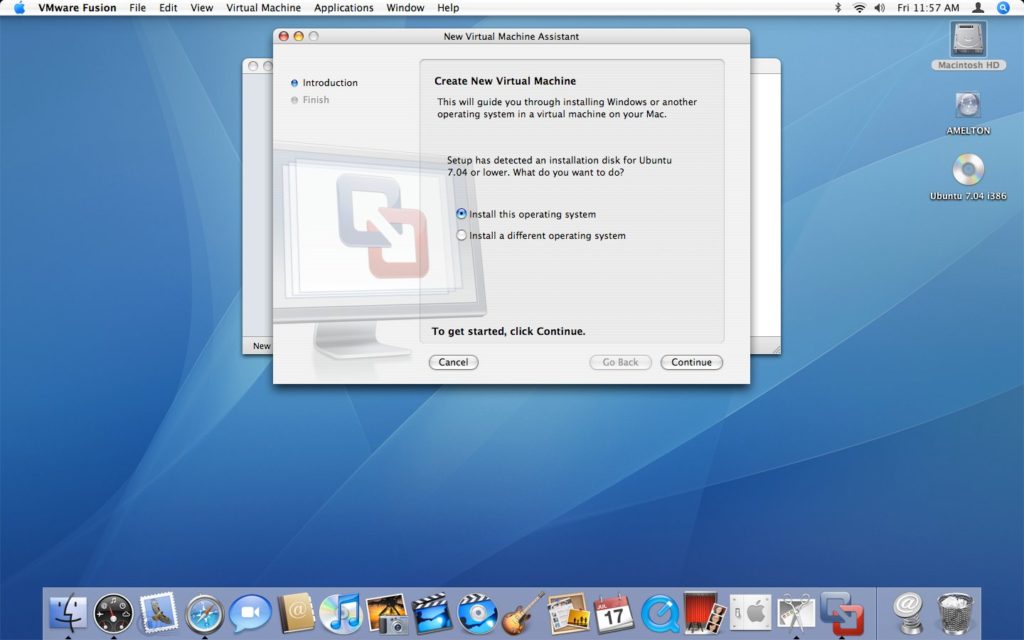
When you first launch the application you are presented with the options of either creating a new virtual machine or downloading one. This reminds me a lot of “Q” (a free, open source virtualization project) which presents you with similar options. With VMware Fusion you will find a lot more options because of their growing Virtual Appliance Marketplace which is growing every single day with new virtual machines. VMware’s Virtual Appliance Marketplace gives users the ability to try out software before they install it or have to commit hardware to an application.
For the review of VMware Fusion I am simply going to install a copy of Fedora Core 6 and I may also try Windows Vista Release Candidate 1; which I received several months ago before Vista was released in January of this year (2007). It’s outdated, but it will give me an idea of how VMware Fusion and this iMac performs.
When you get to the point in the wizard where you tell VMware which operating system you are going to be installing; there is still no option for Fedora, which, really annoys me. It’s not listed in VMware Server for the PC either. You simply have to select “Linux” and then “Other Linux”. I can understand that they cannot list every single distribution but it seems as though Fedora has a large enough user base to be added to the list. Though, I’m sure users of every distribution would say that.
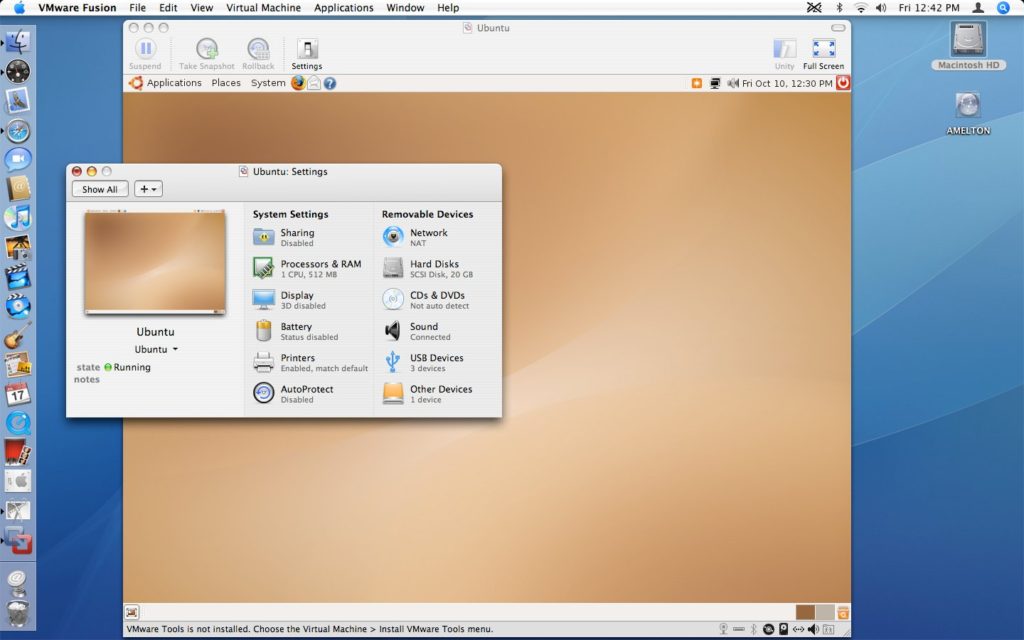
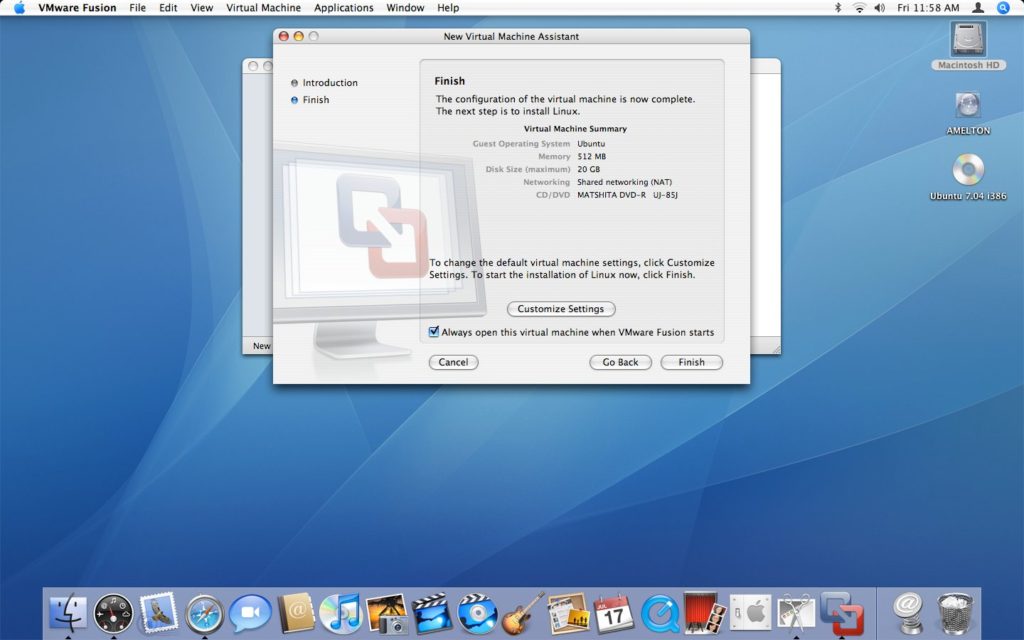
There isn’t a whole lot of difference in the wizard on the PC and the Mac versions of VMware products. Easy. Simple. Wording is the same. When you have finished setting up the virtual machine you are presented with the settings for that virtual machine, just like you are with their PC virtualization products. The windows of course look different since VMware Fusion is for the Mac. All of the default settings are the same as well, such as memory is at it’s standard 256 MB.
There is an option to accelerate graphics. Unfortunately, it says that it is only available to Windows XP Service Pack 2 guest virtual machines.
Another interesting option which at the moment I do not recall being on the PC version is the ability to pass battery status to the virtual machine. This would be useful if you were in full screen mode a lot and were using a laptop.
When you start up a virtual machine it tells you that the software is running in debugging mode. I read a few days ago that you can disable this to increase the performance of the virtual machine. For now, I am going to leave it enabled and see if I notice any side effects.
Unfortunately when I got to the point in the Fedora Core installation I had to shutdown and remove the hard drive and re-add one, this time making sure the option was IDE. I have this same problem with Fedora on VMware Server for the PC.
NOTE: Please see article update at the bottom of this post regarding the new screen shots for this post.
Once I got Fedora Core 6 installed, the performance wasn’t all that great. I decided since the iMac I am running this on has 1GB of RAM, I would increase the virtual machine’s memory to 512 MB and disable the debugging code. The performance did increase somewhat however it would have been a lot better if I were on a faster Internet connection so I could install the required software from the YUM repositories to install VMware Tools.
One thing that I did not like is that in the PC versions of VMware’s products there is an “Inventory View” which shows you all of your virtual machines. Using the Inventory View allows you to easily delete un-wanted virtual machines. In VMware Fusion however, there is not an easy way to delete the virtual machine in the application, that I know of. You can’t drag it off into the trash, right click on it and delete, none of the menu options allow you to delete any of them. I simply deleted the virtual disk from the hard drive to free up the disk space. By doing this, the virtual machine is no longer listed in the Virtual Machine Library list that appears when you start the application.
Once I shut down the Fedora Core installation I decided to throw caution to the wind and install Windows Vista, the Release Candidate I received several months ago. I say throw caution to the wind but the beauty of virtual machines is that the actual computer is protected from being corrupted.
An interesting feature that is available to Windows virtual machines is the ability to use the “Windows Easy Install.” I decided to try this option just to see how well it would work and exactly what it would do. Using this option you give a username, password and your product key before the virtual machine is even started and the operating system installation is underway. It also gives you the option to have your OS X home folder accessible to the virtual machine by default so you can pass files easily between virtual and host machines.
Windows Vista installed without any problems. I didn’t have to answer any questions during the installation. Fortunately, for those who are installing Vista on real hardware they can get this same feature by using vLite. The performance of Vista was decent, much better than it was in a virtual machine on my PC and it was even better than it was when it was installed directly onto my PC.
Two features that VMware Fusion is missing is the ability to take a screen shot or video of the virtual machine that is currently running. These are great features for writing tutorials or showing someone how to do something. I assume that these features will make it into future editions, once they start charging for the product. Video recordings of a virtual machine are only options you can get with VMware Workstation, which is not free. However, capturing screen shots is available in the free VMware Server.
Overall I am very impressed with VMware Fusion. I think VMware has done a great job of creating a virtualization product for the Mac. I’m very happy to see that VMware is going after the virtualization marketplace on the Mac because they have always been my favorite vendor in the PC virtualization marketplace. In a way I am upset to see that VMware Fusion is only available for the newer Intel based Macs, but, with that said, the performance of the new Intel based Macs combined with VMware Fusion comes together for a great virtual computing experience.
VMware Fusion
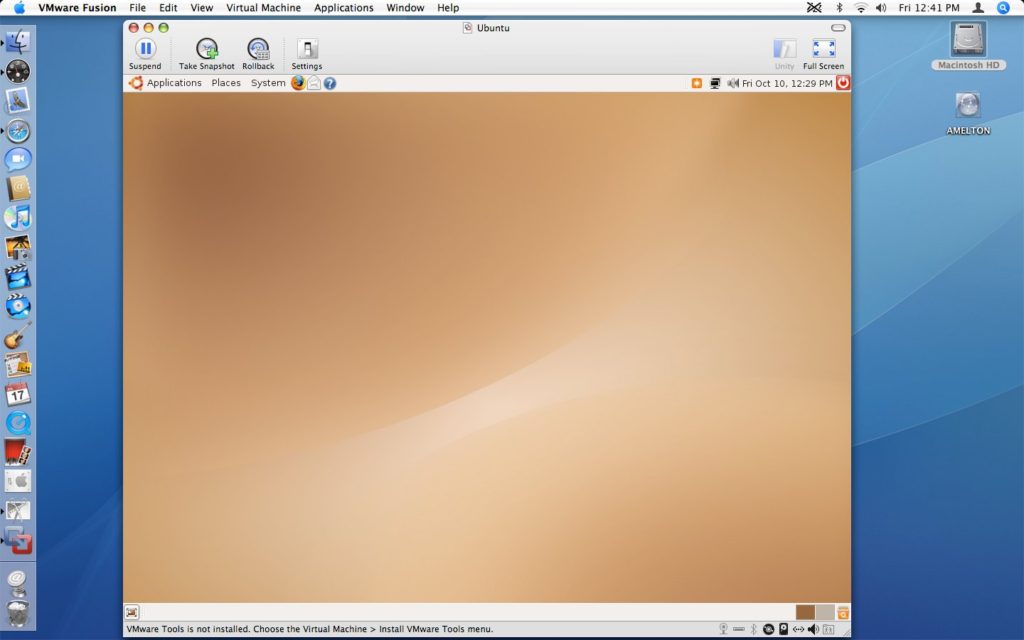
Article update: Wednesday, October 11, 2008: I have updated this article with screen shots from the latest version of this product. Please note that in the article I talk about installing Fedora Core 6 but you are now seeing screen shots of a virtual machine running with Ubuntu 7.04. I’ve been updating the screen shots on TechButter so that they look great with the new, wide theme.
A few things to tell you about the updated product. First of all, the default memory. In the article above I mention that the default memory is 256 MB for virtual machines. They have bumped this to 512 MB as the default.
A neat feature of VMware Fusion that is either new or a feature that I missed when I wrote the original article is OS detection. If you have an operating system disc in the drive when you are creating a virtual machine and VMware Fusion recognizes it, you can use it’s custom settings for that operating system. I used Ubuntu 7.04 which is an outdated version of Ubuntu and was surprised to see that it recognized it.
The fact that there are pre-defined settings for various distributions of Linux and the various operating systems is a really great feature. It allows the developers to make the virtual machine work a lot better. Sound files played without having to install any additional software, which usually, you have to do when you’re working with Linux virtual machines.
The performance of running virtual machines in VMware Fusion has been increased. I don’t think it’s just the fact they changed the default memory from 256 MB of RAM to 512 MB. I think the actual coding of Fusion has been improved to allow a better performance.
I mention above that deleting virtual machines was difficult to find. Deleting virtual machines in the most current version isn’t obvious, but maybe that’s a good thing. It is in the menus, though.
I really hate that I cannot remember whether or not the version I originally reviewed had the “Unity” feature or not. However, the latest version does. Here is the description of “Unity” from VMware’s website:
Run Windows applications like Mac applications, quickly switching between Mac and Windows applications, minimizing Windows applications to your Dock, and even store Windows applications in your Dock to launch at a moment’s notice.
Unity works pretty much the same way Parallel’s “Coherence” mode works. I think all the Mac virtualization product vendors are making sure to implement that as a standard feature.
Unfortunately, there is still not an easy way to quickly capture screen shots or video from VMware Fusion. You would think that VMware would implement this feature since Fusion is their virtualization product for the Mac.
There are a ton of other features. I didn’t even begin to scratch the surface due to time constraints. Learn more about VMware Fusion’s features.
As of writing this article update I have to say that I would recommend Parallels Desktop over VMware Fusion and VirtualBox. I think it works better and has a better feature set.
by andymelton | Mar 26, 2007 | Software
When I first got my Mac there was a productivity plunge. I knew it would just take me a while to build up speed with OS X but this application helped me out a lot. On Windows whenever you Alt + Tab you get a list of the open windows. Whenever you Command + Tab on a Mac you get a list of the running applications. I prefer the Windows way because I like to quickly get to the window I am needing access to.
Whenever you are simply switching between running applications you have to take a couple of steps, you have to switch to the application and then you have to select with your mouse which window in that application you are wanting to focus in on. The less I have to take my hands off of my keyboard the more productive I am.
I have my old Windows keyboard connected to my Mac through my KVM switch. This allows me to be even more productive, at least on my setup. I can use the Alt + Tab command on my Windows keyboard and it will bring up the Witch task manager. I can quickly go to the window I need access to. This is really great for instant messaging because I can quickly get to the IM window and then back to the application I was previously working in.
Installation is fairly simple. Double click and it installs into System Preferences. You have to go to “Universal Access” and check a box beside “Enable access for assistive devices.” Once you do that, Witch will work.
Witch has a lot of customization options. You can choose the key commands, animation options, applications to ignore, etc. If you’re coming from Windows to Mac OS X you’ll probably greatly benefit from this application the most.
Witch Homepage