You’ve probably been listening to podcasts for a little while now and you’d like to start your own. You’re not sure about what you need to do to get started. I am going to assume that’s why you’re here. You’re wanting to know what type equipment and software you need as well as how hard it is to get going. That’s what I am going to discuss in this article.
There are so many different ways you can podcast. There are several hardware and software choices to make. In this article I am going to discuss how you can have a podcast for under $20 or if you already have a headset microphone, I’ll show you how to podcast for free.
Have an idea
I feel that the shows that succeed have something to talk about. They have information that will help the targeted audience. The great thing about podcasting is that it is a new medium and you have the power to help define what it becomes. You are not censored in any way and can say whatever you want.
If you’re recording about your day to day life, don’t just record what is going on. Record how you feel and your thoughts at that moment. In my opinion that’s better than someone rattling on about what they did that day.
Get an idea and roll with it. Don’t be too broad but don’t be too specific either. Also, the last piece of advice that I can give you is this: Don’t make the title of your show “daily” or “weekly.” Unless you are absolutely sure you can deliver content when your title says you will be delivering it. You will always feel guilty when you’re not delivering content when you said you would be.
Recording Yourself Talk
Location
Now that you’ve got a title and an idea it is time to start recording yourself. Before we get to the actual software we need to discuss a couple of things. First, you need to be in a relatively quiet location. The cheap headset that we’ve got is going to pick up background noise. Even the noise canceling headsets will pick up some background noise. You might want to turn off the heat or air conditioning, close the doors, windows and turn off any gadget you can live without while you’re recording.
Equipment
If you already have a headset microphone then you’ll be able to do a podcast for absolutely nothing. I think this is absolutely the best way to start out. Once you get comfortable with it you can start to add in more advanced equipment, software and hosting packages.

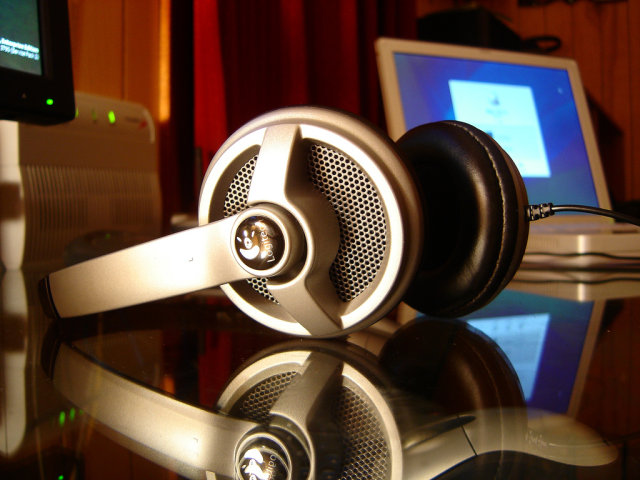
If you don’t have the headset microphone yet you’ll want to go ahead and purchase one. I have had great luck with Logitech’s Premium Stereo Headsets. I’ve owned a few of them so far. One thing to note is that you’ll probably have to replace these every couple of years. It’s not that they’re bad headsets it’s just that they get worn out over time. I’ve experienced this with every brand I’ve owned.
If you’re podcasting from a computer that does not have analog input/output ports you’ll need to get a USB headset. In the past I have had great results with the Logitech Premium USB Headset 350.
Also, don’t think that you need an expensive computer to record a podcast. I use to record an audio journal with my Toshiba Satellite 315 CDS. It had a 200MHz processor, 32 MB of RAM and a 2 GB hard drive. It recorded audio really well. It took a little bit longer to export the finished recording to MP3 but it wasn’t that bad. Not many people have a computer that old so I wouldn’t worry about the computer you use.
If you’re going to be recording yourself while you’re out you might want to invest in a portable audio recorder. Look for something that has a line-in or microphone port. I have had great results with my iRiver iFP-895. These are great, especially if you’re out and you get to thinking about something and want to record it.
Software
Most of the software I am going to mention in this article is cross-platform. That means that you can use it on Linux, Apple Mac OS X and Microsoft Windows. If you have a Mac that came with iLife then you’re already set. You can use GarageBand to record and publish your podcast. Skip over the Audacity, LAME, and ID3-Tag editing software sections of this article if you’re going to be using the iLife suite. If you don’t have iLife then I’ll help you get going with free software solutions available for the Mac and other platforms.
Audacity
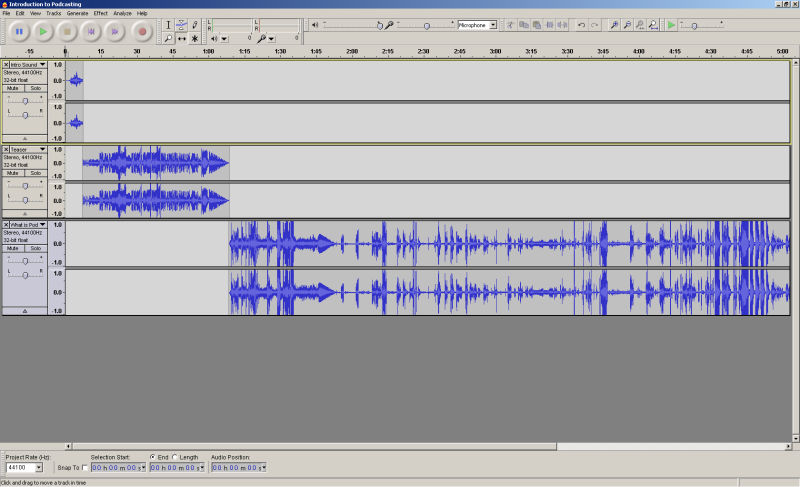
To record ourselves we are going to use Audacity. Some people say that Audacity is complicated and does not offer them all of the features that they want; they want the ability to play sounds while they are recording. I think Audacity is really simple to use. Regarding playing sounds while recording; this is not an issue for me because I just add in the audio after I have finished recording. I think Audacity is basic yet powerful at the same time and I highly recommend it.

When you download Audacity I would recommend getting the beta version. It has more features and is pretty stable. Just remember that it is beta software and may crash. Though, all software is prone to crashing in my opinion. Especially if you’re not on the latest and greatest hardware.
Lame Encoder
This will allow you to export MP3 files out of Audacity. There are different ways to get it working between the three platforms. I’ll tell you how to get going with it for each platform.
On Windows: The best place to get the lame_enc.dll file for Windows is from Free-Codecs. Download the file, extract and place somewhere on your hard drive; I usually put the folder in my Program Files directory. Open Audacity and go to Edit > Preferences and then find the section that says “MP3 Export Library Location” and click on “Find Library.” Navigate to where you placed the LAME files and locate the lame_enc.dll file. It should only show that specific file whenever you are navigating through the directories. Once you find it double click on it and you should be set.
On Mac OS X: You can download LAME from the official website but a much easier option is to download the LAME library from Spaghetti Code. Download the version that will work on your platform; extract and place it somewhere on your hard drive. I like to keep this in the Applications directory inside a folder called LAME, just for organizational reasons.
Go back into Audacity. Click on Audacity >> Preferences and below MP3 Export Setup click on Find Library. Navigate to the location you placed the file, double click on it and you should be good to go.
On Linux: The quickest and easiest way to get the LAME encoder on Linux is to install it through the application repositories provided for your distribution. The Audacity website has more details.
Configuring Audacity
If you’re not going to be playing music and you don’t require a super high quality version of your podcast you should change the bit rate of the audio to 96kbps from the default 128kbps. This will keep the file size smaller and allow your subscribers to download the file a lot quicker. It may also help keep your web hosting costs down. If you want to keep a higher quality version of the file you could export it as 128kbps (or higher) for archival purposes and export a lower quality version for publishing on the web. One of these days broadband will be more ubiquitous and you might want to release higher quality versions of your old podcasts.
Also, I always change the default setting of Mono recording to Stereo. If you’re just talking you can use Mono and your file size will be smaller. The reason I always change mine to stereo and leave it is because in the past I have forgotten to change it back to Stereo when I want to add music into the recording.
Recording & Exporting
Now that we’ve gotten Audacity properly set up, we can start recording! Remember, make sure you’re in the quietest location possible (unless you’re wanting to record a sound-seeing tour), keep the microphone close to your mouth but not too close (helps avoid popping), hit the record button and tell the world your story!
Once you have finished your recording you will immediately want to save your audio file as an Audacity Project File. Doing this will ensure that if your computer locks up or the power goes out you can access your recording and finish editing where you left off.
You can now add in any audio files such as intro music, exit music, etc by using the audio import function. When you import that audio just move it around to the desired location. If you want to edit out a section of audio, use the selection tool, highlight it and cut it out. This is very useful for taking out the “Uhmmms.”
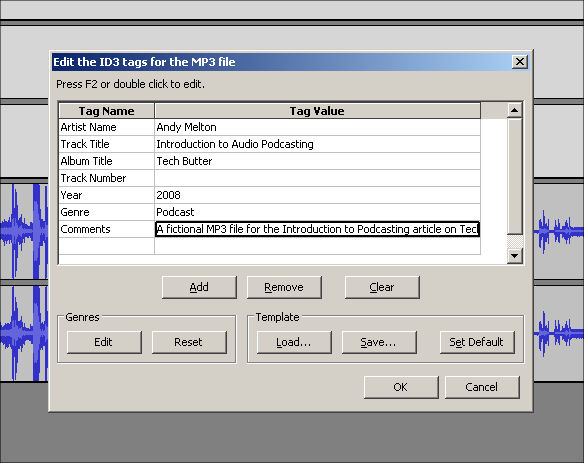
Once you are satisfied with the recording you can export the file as an MP3 (under the file menu). Audacity will ask you to enter ID3 tags which we’ll discuss below.
ID3 Tagging Software
Now that you’ve recorded and exported your podcast as an MP3 you can now start to add things into that MP3 file that will define it using ID3 tags. You can add album art, title of the show, author, genre, recording date, comments, etc. These are all things that describe the content of your audio file. This information will help your audience identify your podcast in their audio library and help them keep things more organized.

When you export a file from Audacity it will prompt you to enter ID3 tags for the file. Generally, the fields it gives you are enough information for a podcast recording. The only thing it won’t let you do is embed album art into the file. Album art is an image that will display in the media player window or on some portable media player screens while the file is playing.
If you’re using Microsoft Windows you can use a program called ID3-TagIT which will give you many more advanced tagging options. Once you have downloaded and installed ID3-TagIT you’ll navigate to the directory your MP3 file is located in. Once you’re in the directory select the MP3 file and edit the information on the left. If you need more fields click on “More.” Once you have added all the desired tags click on “Ok” and save the file.
Unfortunately, I’ve not been able to find an ID3 tagging application like ID3-TagIT for Mac OS X and Linux. The ones that I have found don’t give you anymore options than what you get with Audacity. However, for Mac OS X and Microsoft Windows you can edit ID3 tags with iTunes. Put the file into your Music library, right click on the file and click on “Get Info.” Edit the desired fields and close the window. Export the file out of iTunes (drag and drop somewhere), then upload to your hosting account. For those geeky Linux users out there you could try installing iTunes through Wine.
Content Subscription
One of the best things about podcasting is that you don’t have to tune in at a specific time and you also don’t have to remember to set the VCR to record the program. With podcasting people will subscribe to your podcast feed and whenever you publish a new episode the subscriber’s podcatching client will automatically download the file.
There are a couple of programs for Windows that allow you to create a custom feed with enclosures. The first being FeedSpring. It’s a really simple application. You download, install, create a new feed and then start adding items to that feed. Once you create a feed and save it you can upload the file to your hosting account and use it on FeedBurner or iTunes.
Another program for Windows is FeedForAll. This program isn’t freeware. I don’t have any experience with it but it does look like a good program for creating feeds. It’s also up-to-date. The latest version of FeedSpring is May 21, 2005 and the latest version of FeedForAll is from March 10, 2008 (as of this update to this article).
If you’re on the Mac you can also use FeedForAll. However, I’d also highly recommend a program by Reinvented Software called Feeder. I’ve used it for a couple of years now and think it’s a really great program. It’s not free but it’s worth every penny.
Unfortunately, for you Linux users out there I don’t have an application to recommend to you for feed creation. I wish someone would get on the ball with it!
There is an alternative to using feed creation software. This could be the option for you Linux users out there. Most blogging software now supports enclosures for each entry. With WordPress you can attach an audio, video or any other file and it will attach it to the feed. Even if you just put a link to the file somewhere within your blog post most feed readers will download the enclosure.
FeedBurner
This is an optional step but one that I highly recommend. Set up a FeedBurner account and tell FeedBurner where your feed is located. Then, give the URL of your feed that FeedBurner will give you to your listeners. The biggest reason for using FeedBurner is if you decide to move your feed later on, you can move your feed, update the location on FeedBurner and your listeners will never know and they won’t have to re-subscribe.
Also, FeedBurner makes it easier to get your podcast listed in iTunes. They also give you a lot of tools that you can use to promote your feed.
FeedBurner has some tracking abilities for your feed. In my opinion, these statistics are somewhat inflated so be skeptical of what FeedBurner says your subscriber number is.
Publishing your podcast
Once you have finished creating the feed, save it and upload it to a website somewhere. If you don’t have any web hosting, get some free hosting from somewhere and upload it there. The file will be small and the users won’t have to visit the site to get the file, if you’re using FeedBurner. Also, you’ll need to upload the actual podcast, the MP3 file you created.
Once you have the feed uploaded somewhere you can either submit it to iTunes through the iTunes Store, submit it through FeedBurner or if you’re using Feeder you can use it to submit your feed to the iTunes Store.
Web Hosting Account
The easiest way to publish your podcast is to purchase some web hosting or to use the hosting that you already have. There may be issues with this. One may be a lack of space or a lack of bandwidth. I am using GoDaddy web hosting to host all of my content. I have had very good luck with it and is very affordable. If you use a web hosting service like GoDaddy, just upload the file to the site and then in your feed creation tool, link the feed to the file on your server.
Mevio
You may not be able to purchase hosting. Don’t worry, there are free options out there. You could use Mevio to host your files. Mevio includes an ad at the beginning and end of audio files hosted with their service. It’s a decent trade off. You get free hosting and they get a little advertising in on your file. In my opinion, it’s not that bad. The great thing about Mevio is that the delivery network is great. Your files will be delivered to your subscribers very quickly.
If you use Mevio you won’t have to worry about creating the feed using a feed creation tool. However, I do highly recommend linking your Mevio feed to FeedBurner so that if you decide to host your media somewhere else you won’t have to worry about losing any subscribers during the transition.
Blogging your Podcast
Now that you have your podcast recorded, added to a feed, published and all that. You need to add it somewhere so your subscribers can have a list of previous episodes and also leave comments on your episodes. If you already have a blog, add it there. If you want to keep it separate, make a new blog. If you don’t have any hosting you can use something like Blogger.com or WordPress.com (I would highly recommend WordPress.com as a free blogging site over Blogger.com).
Promoting your Podcast
Finally! You can start promoting your podcast! Join podcasting communities. Send emails to family, friends or co-workers. Make sure they know how to listen! Tell them how to leave feedback for you! It may take a little while for you to build up your listeners so don’t fret if people don’t comment immediately. It’s really hard to get people to comment on your stuff, trust me, I know! Just keep doing it! Get better at it! Most importantly, enjoy it!
Article update: Saturday, September 27, 2008: The original title of this article was “Podcasting on Windows.” I have since updated this article to encompass podcasting on the three major platforms (Linux, Mac and Windows) using free and open source software.
Please note that this article is not meant to be a tutorial. It’s meant to introduce you to podcasting and what is involved.