In the previous blog entry I wrote about Aqua Connect Terminal Server for Mac OS X. While I think it’s a great application for an organization that can afford to implement it, I cannot. I’m sure there are others out there wanting to implement terminal server functionality but can’t afford to pay for a proprietary product either. If you are one of those people, I have great news for you! You can do it right now, for free! All it will take is a Mac with OS 9 or later (I am running OS 10.4.11), Vine Server, a little time and maybe a few groans here and there. But hopefully, this tutorial will get you up and running without going through the moans and groans that I did! Let’s get started.
User account creation and fast user switching
The first task that we’ll take care of is setting up users. I am using a fresh installation of Tiger but you may not be. The first user that I would recommend setting up is an Administrator account.


This is simply an account named “Administrator” with administrator privileges. This is an optional step but I find that it lessens the confusion of system administration. It also gives you an account that you can use to login to the machine you are setting this up on without disturbing a session of another user or your own.
Once you have multiple users set up you need to enable fast user switching. Either click on the System Preferences icon in the dock or from the desktop click on the Apple icon and then System Preferences. Once the preferences panel has opened go to Accounts. Look for a button labeled “Login Options” and click on it. If you cannot click on the button you’ll need to un-lock the system for changes by clicking on the lock at the bottom of the panel. Once there you’ll want to make sure that “Automatically log in as:” is unchecked. Under “Display login window as” I would recommend selecting “Name and password.” This way if someone happens to connect to your system through the network they will not see a list of your user accounts, which will give them half of the information they need to gain access to your system. The very last option is a definite necessity, check the box beside “Enable fast user switching.” The “View as” option is your own personal preference but I personally like the icon since it doesn’t take up so much of the title bar.
System VNC Server, Accept SSH connections and Firewall Configuration
Vine Server does have a system server but I do not recommend using it because it interferes with the functionality that we are trying to achieve. Instead, we will use the system VNC server. To enable it stay in System Preferences.
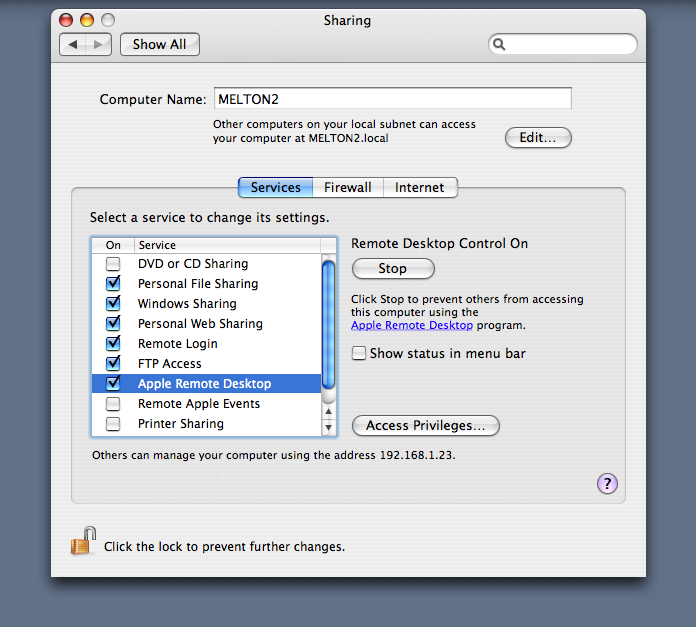


Click on Show All at the top to return to the main panel. From there click on Sharing. Click on Apple Remote Desktop. The service will start and you’ll need to assign a password in the section “VNC viewers may control screen with password.” You do not have to configure each user account with permissions. The permissions at the top of this screen are for Apple Remote Desktop software connections only.
If you are going to want your users to connect using SSH (great for security) you’ll want to enable the Remote Login service in the Sharing panel as well.
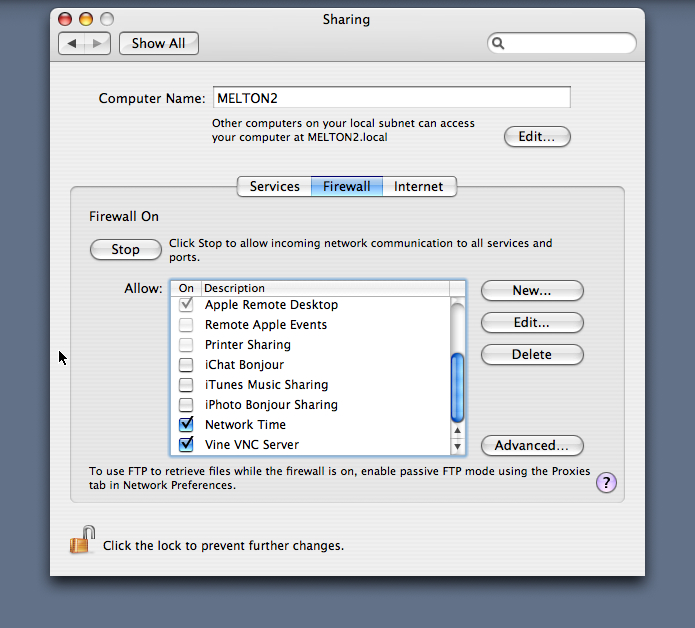
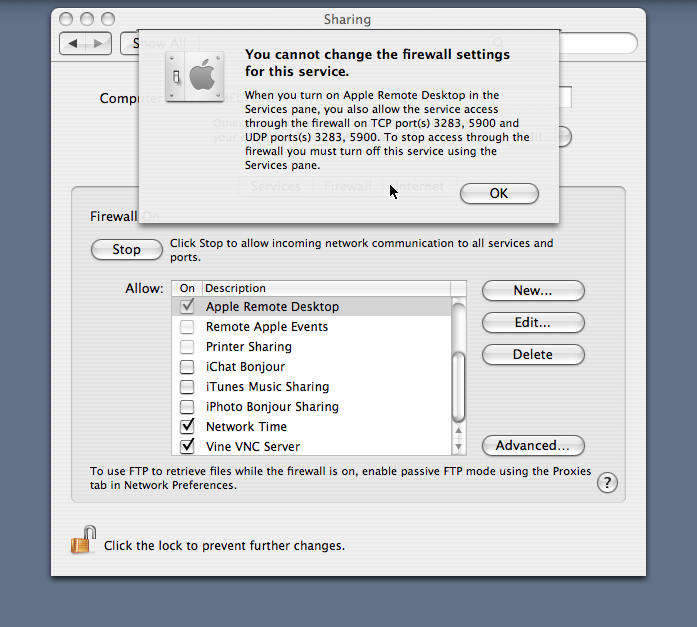
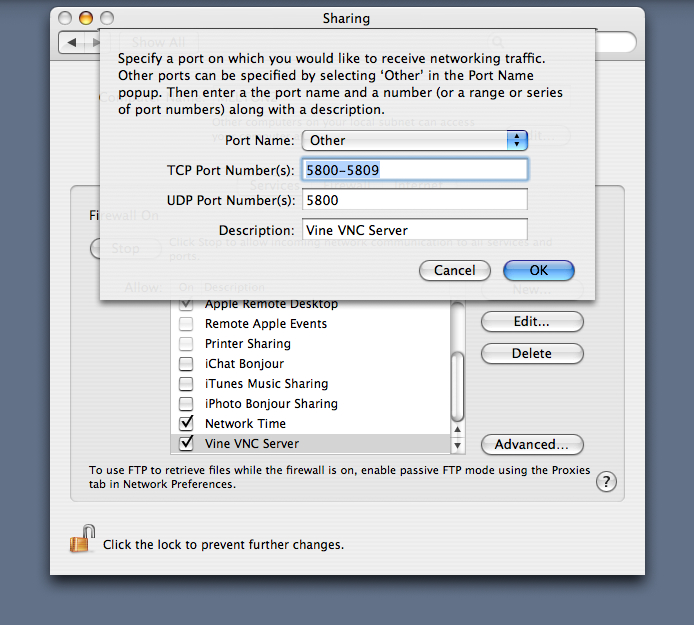
Next we’ll configure the firewall so your users can connect remotely. From the Sharing panel click on Firewall. Make sure that “Apple Remote Desktop” and “Remote Login – SSH” are checked. They should already be enabled. If not, simply select the check box beside them. Next, we need to allow connections into Vine Server (which we will install next). Click on New. Choose Other from Port Name. In the TCP Port Numbers field enter: 5800-5809. In the UPD Port Number enter: 5800. In the Description enter: “Vine VNC Server”. You can now close system preferences.
Install Vine VNC Server
Next you’ll want to login to your Administrator account (again, this is just a personal preference) and install Vine Server.
Configure user accounts
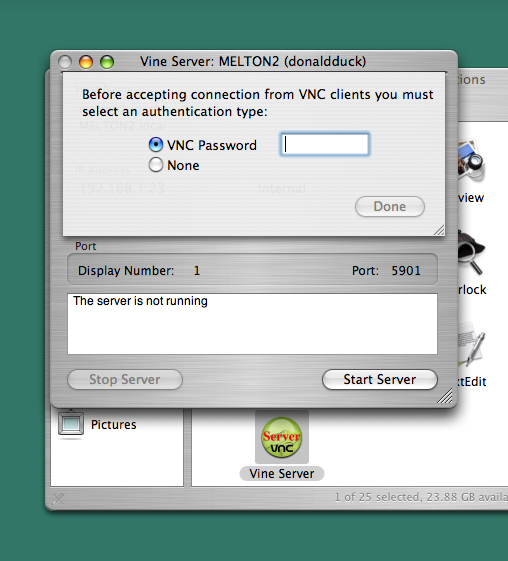
After you have installed Vine Server log out of the Administrator account and log into one of the other user accounts that you created. Inside of each user account do the following: Launch Vine Server from the Applications directory. You’ll be asked to either enter a password or choose none (no password required). I would recommend using the same password that is assigned to that user account. Now, to make sure that Vine launches at log in. Right click on the Vine VNC icon in the dock and select “Keep In Dock”. Right click on the icon again and select “Open at Login”.

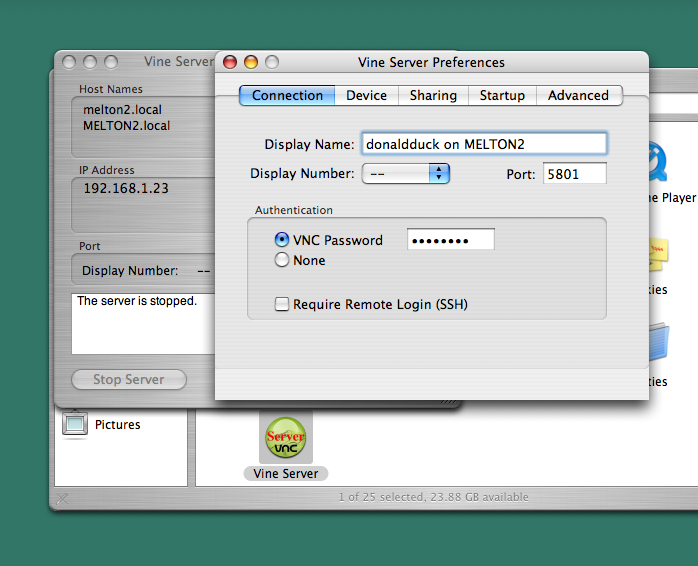


We’ll need to make some changes to the Vine Server. From the toolbar click on Vine Server >> Preferences. The first thing you will enter is a display name for the connection. I like to use “username on machinename.” This is for organizational purposes so whenever I connect to the server from a remote machine multiple times I will know which account I am in.
We now need to configure the port. Since we’re also running the system VNC server we cannot use the default ports. This is why I had you to add those ports in the firewall. Otherwise, we could have used the standard VNC option in the drop down menu. You can use port 5800 for this first account but I prefer to use port 5801 for the first user account, 5802 for the second, 5803 for the third and so on. Again, it’s a personal, organizational preference. Before you continue you can also choose whether you want to require users to connect via SSH before they can make a VNC connection. Generally, on a local network I don’t require users to connect via SSH. If a user was connecting remotely, I would.
Let’s switch to the Device tab. Since this machine will be used by multiple users we want to make sure that it will not go to sleep. We also want to make sure that the screen saver is not running. Running a screen saver over VNC will make everything on your network extremely slow. Make sure those check boxes are not checked.
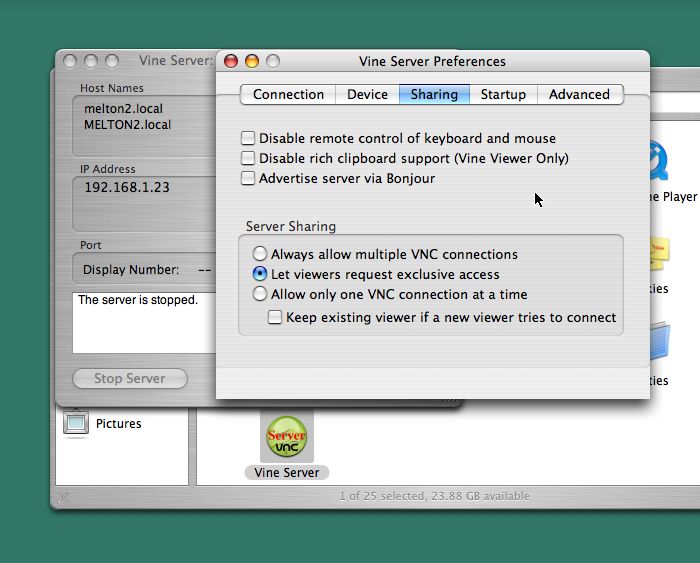
In the Sharing tab, I select “Always allow multiple VNC connections.”
Lastly, make sure that “Stop server on a fast user switch” is unchecked. Otherwise, when you log out you won’t be able to connect again unless you use the system server VNC connection to log in.
Configure all of your users with these settings and reboot the server.
Connect to Apple’s built-in VNC Server
To connect to the system VNC server you’ll need a VNC Viewer. For Windows I recommend TightVNC Viewer. If you’re using Linux use Vinagre or TightVNC. If you’re using a Mac you can use Chicken of the VNC. Testplant has a VNC viewer called Vine Viewer that you can purchase for added functionality.
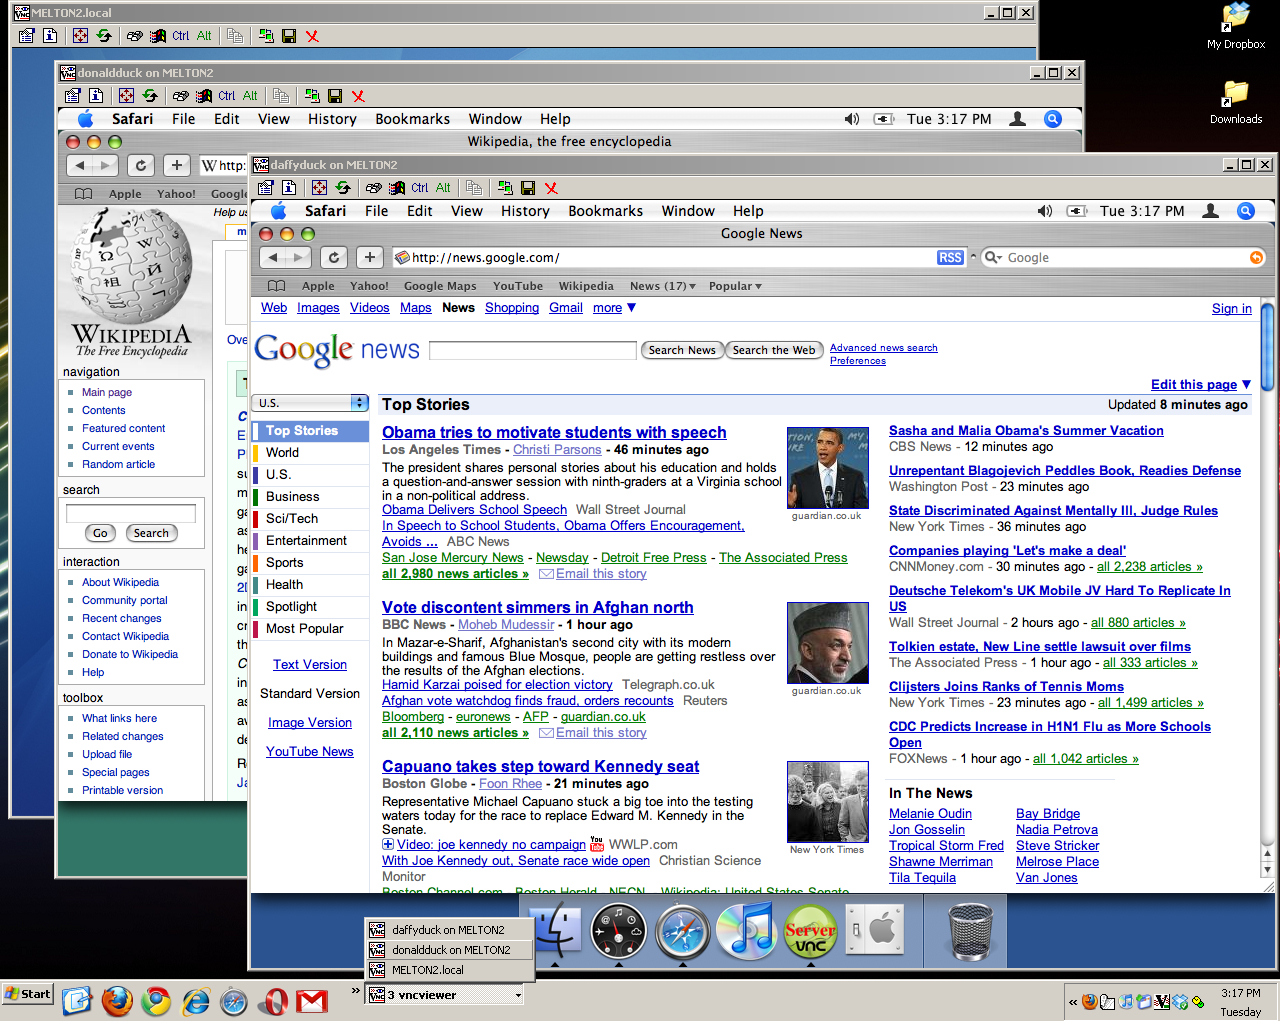
Once you have chosen a VNC viewer, open it and enter the IP address of the Mac you are setting up as a terminal server and connect. You should be asked to enter the password you entered in the Apple Remote Desktop settings. Enter the password and you should then see the log in screen.
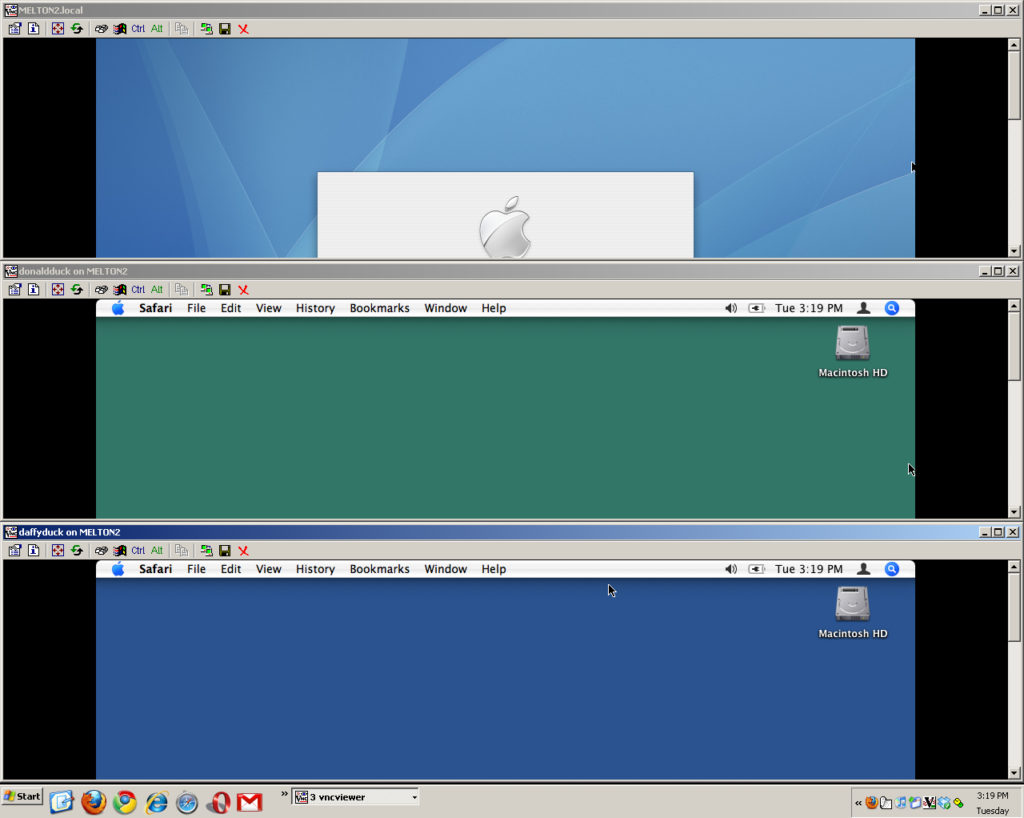
Now all you have to do is log in to each user account so that each account has Vine Server running in it and return to the log in screen using fast user switching. Make sure that you don’t log out or you won’t be able to connect to the VNC server that is running inside of each user account.
After you have finished starting up Vine server in each user account and have returned to the log in screen you can disconnect from the system server.
Connect to user account Vine servers
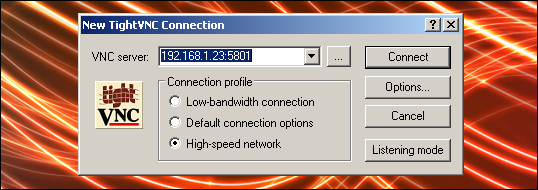
To connect to the user VNC servers the only change you will make in your connection process is the IP address in the VNC viewer. This time you will enter the IP address of the server followed by a colon and a port number. Example: 192.168.1.23:5801 – This will connect your VNC viewer to the first user account in which you launched Vine server. You’ll be asked to enter the password that you specified in that user account.
NOTE: The default VNC ports are 5900 but since we are running the system VNC server we had to use a different port range for the user VNC servers. If you were not running the system VNC server and were using the default port range you could simply use 192.168.1.23:1
Final Thoughts
No, this is not a true terminal server. However, if you need this type of functionality and are not willing to pony up the dough, I think this is a great solution. At least, it’s the only solution I have been able to come up with! I think my next experiment will be to see whether I can achieve better performance with it using a FireWire connection. I’ve got to get the FireWire 6 pin to 6 pin cable first. I’d also like to eventually have a dumb terminal connecting to the server to display the Mac OS X desktop.