A lot of people have been getting into video blogging lately. Rightly so because it is becoming much more popular. Once upon a time downloading a video on the Internet was atrocious because it took forever to download a 2 or 3 minute clip.
It was extremely annoying, however, today with much faster and lower cost Internet access, videos are becoming more popular, especially with video services like Google Video, YouTube, Vimeo and others. I have been asked how I produce my videos so I thought I would make a blog entry about it. Now, I have to make a disclaimer. The way I do it is probably different than the way everyone else does it. There are many ways to go about video blogging.
NOTE: Please see article update below to see the changes I have made to my video blogging process over the two years that this article has been online.
Recording Video
So what can you record with? Well, obviously you can record with a camcorder. What if you don’t have a camcorder? Do you have a digital camera? Do you have a webcam? Most new digital cameras record video and do a decent job of it. Most of them don’t offer zooming while you record a video and a lot of them are very poor in low light situations, however, if that’s all you have then make the most of it. When I record my videos I use my Sony Cybershot (DSC-P93A) digital camera. With it I can record as much video as I want as long as I have the storage for it on the memory card, so, the larger the memory card, the more video I can record. I’ve also recorded video using my old web cam (circa 2002). Regardless of which method you choose, there are many ways to record video so don’t let not having a fancy camcorder get in your way.
Importing Video
Luckily, for me, when I record videos on my Cybershot it is a really painless task to pull the videos from the camera. I simply hook up the camera, turn it on, navigate to the folder and drag and drop the files where I want them to be on my hard drive. If you’re recording with a web cam you’ll be saving directly to the hard drive which will make the next part of this process one less step away.
I have imported videos using a camcorder before, not using anything fancy like firewire though. A couple of years ago I purchased an ADS Tech Video Capture device that allows you to plug in an analog camcorder or any analog video source such as a VCR and pull video from that source and put it onto your computer. It is slow because you have to do it in real time (meaning you have to sit and watch as you record it to your hard drive). The capture device that I purchased came with easy-to-use software to record your videos. The only major problem with this technique is that the file size will be huge after you have recorded all of your footage onto the computer. Usually, for me, it is at least a couple of gigs.
Editing the masterpiece
Once you have all the footage onto your computer the next step is to piece everything together, add your effects, transitions, star wipes, etc. You can choose not to, it is obviously up to you, you are the artist. A lot of times I will simply put the videos together and then export it for lack of time and better software.
Speaking of software I should tell you what I use. I use a program called InterVideo WinDVD Creator. It came with my DVD burner and is more geared towards burning videos to DVD, however, it works for my purposes. I should say though that there is much better software out there, I simply use this because it came with my DVD burner.
Encoding
You’ll probably scream when I tell you this, but, I encode my videos twice. The first time I encode my video I am exporting the file out as an MPEG2 file using the highest quality setting so that there is not a lot of compression happening and the video exports a lot quicker. To encode the video the first time I am still using InterVideo WinDVD Creator.
Before you move on to the next step you might consider burning this file to a DVD for archiving purposes.
Once I get the video encoded the first time I am ready to compress it down into a much, much more reasonable file size. For this I use a program called Videora iPod Converter. It converts the video file down really nicely without taking away too much quality. It also has a one-click transcode feature which is really nice and easy. You simply tell it where the file is and hit the button and it spits out a nice MP4 file. Now, some people may throw up their arms and say “BUT WAIT A MINUTE, I don’t have an iPod to play iPod videos!” Don’t worry, I don’t have an iPod either and I use a program called VLC Media Player to play the video files and iTunes will also play them which is what most people use to subscribe to podcasts (unless they’re like me and use Podnova, but, I digress). So, don’t worry! A lot of people use to fuss about file formats however Linux, Mac OS and Windows are all capable of playing the same file formats (with the proper software).
Publishing – Where to host the file
OK! You’ve got your video recorded, imported, edited and encoded! Now, you need to get it published which means you’re first going to have to have a place to put the file online.
There are several resources available to you. If you want to pay for web hosting you can purchase some web hosting at GoDaddy or another hosting company.
The second option is a free option. You can upload your videos to PodShow and use their network to host your videos. Currently, they are doing the same thing with audio and only adding an ad to the beginning of the show. In my opinion this is acceptable because you are getting free hosting. Currently, to my knowledge they are not placing ads on videos that you upload to the network. If you’re strapped for cash then the free option from PodShow is a great service. Also, take this into consideration, you’ve got a REALLY good service like PodShow worrying about all the bandwidth. You don’t have any limits like you would with your web site hosting company. In my opinion I think it is a win-win situation. Now, if you’re still not comfortable with them placing ads onto your content there is a second option and it is free as well.
You can set up an account on archive.org and upload your videos there. Now, I have used archive.org and it is a great service and I really like what they’re doing (archiving everything, hence the name), but, IT IS SLOW!
The last option that I know of for hosting your video is to use a service such as YouTube, Vimeo or one of the other online video publishing services. Most of them are free and allow you to upload whatever you like as long as it is not copyrighted. With these services you also have to be careful about nudity and language because there are a lot of people who get offended very easily who traverse these websites.
So keep those in mind as you are looking for a place to host your file.
Publishing – Uploading the file
Now that you’ve decided on a location for the file, how are you going to get it there? Well, if you’re using either the PodShow, Archive.org or “YouTube like service” option then you will upload your content using their transfer utility on their website. If you purchased web hosting somewhere then you’ll need to FTP your video up using an FTP client such as FileZilla.
Publishing – Blogging
Now that you’ve got all that work done, there is even more! Don’t worry, there is only one more step after this one! If you’ve got a blog you’ll definitely want to make a post about it, otherwise, how would people know about it? So, what you’ll do or I should say, what I do is I go and make a post as normal and then I simply link to the video file. Sometimes I will take a screen capture of the video at an interesting part of the video and upload the image to my blogging software and link the image to the video file. To take a screen capture of a video I again use VLC Media Player, which, on Windows, saves the picture to the “My Pictures” folder by default.
Publishing – RSS Feed
Now you need a way for your subscribers to subscribe to your content so that they can plug it into iTunes, Podnova or whichever podcatcher that they use. You’ll need some software to do this. If you’re on Windows you can download free software called FeedSpring which is what I use for my audio & video journal. If you’re on Linux you can use FeedSpring as well you’ll just have to use it through Wine emulation. If you’re on the Mac you can check out my friend Steve’s software called Feeder which allows you to create RSS feeds on the Mac.
If you are uploading your videos to a service like Podshow, archive.org or your own hosting account, use the software I mentioned above to create a link to the file once it is uploaded. If you are hosting the video on a service like Vimeo, you can still create an RSS feed that will take users to the page that you are showing the video on.
Once you’ve got your feed created the next step that I would highly recommend to everyone is adding it to FeedBurner. The reason I say to put your feed on FeedBurner is so you can much more easily submit your feed to services such as iTunes. Also, the most important reason for using FeedBurner is because you can easily change the location of your feed. Lets say you have your feed in a directory on your server called “blog” and you decide later on you want to move it to another folder called “feed” you can do so and then you can simply update the address in your FeedBurner account, that way, your users won’t have to re-subscribe to anything.
FeedBurner will also give you statistics for your feed, however, don’t count on them too much, at least, that is how I feel about them. The counter always seems a little inflated. To get a true look at the people who have downloaded your video you need to look at the statistics for your website, not the RSS feed. Robots brushing up against your feed will cause your numbers to rise.
Publishing – Statistics
Now that you’ve got the video online you’ll probably want to know how many people are downloading and watching your content.
If you purchased web hosting you should be able to log in to a statistics area for your website and track the total number of downloads for your file. Most services offer this as a free package. Some don’t so you’ll have to check with your hosting provider.
If you uploaded to a service like PodShow, Archive.org, or a YouTube like service then most of those services will display a “viewed” number.
In Conclusion
Finally, I want to leave you with a web link to a blog that talks about how to get the most out of your recording experience.
8 Ways To Shoot Video Like a Pro (from Lifehacker)
I hope this entry has helped you! If it has, let me know. If it hasn’t, let me know and tell me how I could make it better. If you have any questions you’d like answered on this blog feel free to contact me! Thanks for reading!
Article update: Wednesday, December 17, 2008: It has been a couple of years since I have published this article so I have changed the way I record and publish my videos. Not a whole lot but I think it’s worthy of updating this entry to reflect the changes.
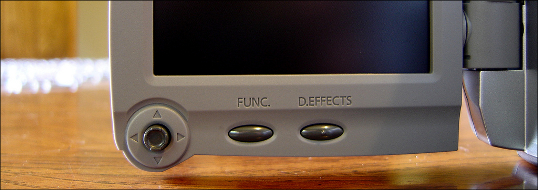
The first change that I have made is that I am now recording with a DV (Digital Video) camcorder (a Canon ZR800) in addition to my Sony Cybershot DSC-P93A. The camcorder records video at a much higher resolution and I have more options for recording. Importing video is more time consuming than dragging and dropping a file from a memory card. To pull video from the DV camera you have to pull it off in real time, meaning you have to watch it as it comes into the computer. DV video also takes up a lot more hard drive space. One DV video cassette takes up 20 GB of hard drive space.
The second change that I have made is that I am now using different software for editing and encoding. I am now using Sony Vegas Movie Studio Platinum edition for editing. It’s really great software but it’s not free. For encoding my videos to iPod format I am now using MPEG Streamclip, which is free.
The only other change that I have made is the way I publish videos to my RSS feed. I am no longer using FeedSpring and am now using Reinvented Software’s Feeder, which is a great way to publish enclosures to an RSS feed. I highly recommend it.